The first time I tried to make a ham glaze, I was chasing a culinary dream that ended in a sticky kitchen disaster. I had a ham sitting on my counter, the smell of smoke and sweetness already mingling, and I thought, “Why not add a glaze?” The result was a glaze that stuck to the ham like a second skin, a caramelized crust that made the ham look like a golden trophy. I laughed, then cried, as the oven door opened to reveal a glossy masterpiece. That moment taught me that a glaze can transform a simple ham into a showstopper, and it sparked a quest for the ultimate brown sugar ham glaze recipe that would become my signature dish.
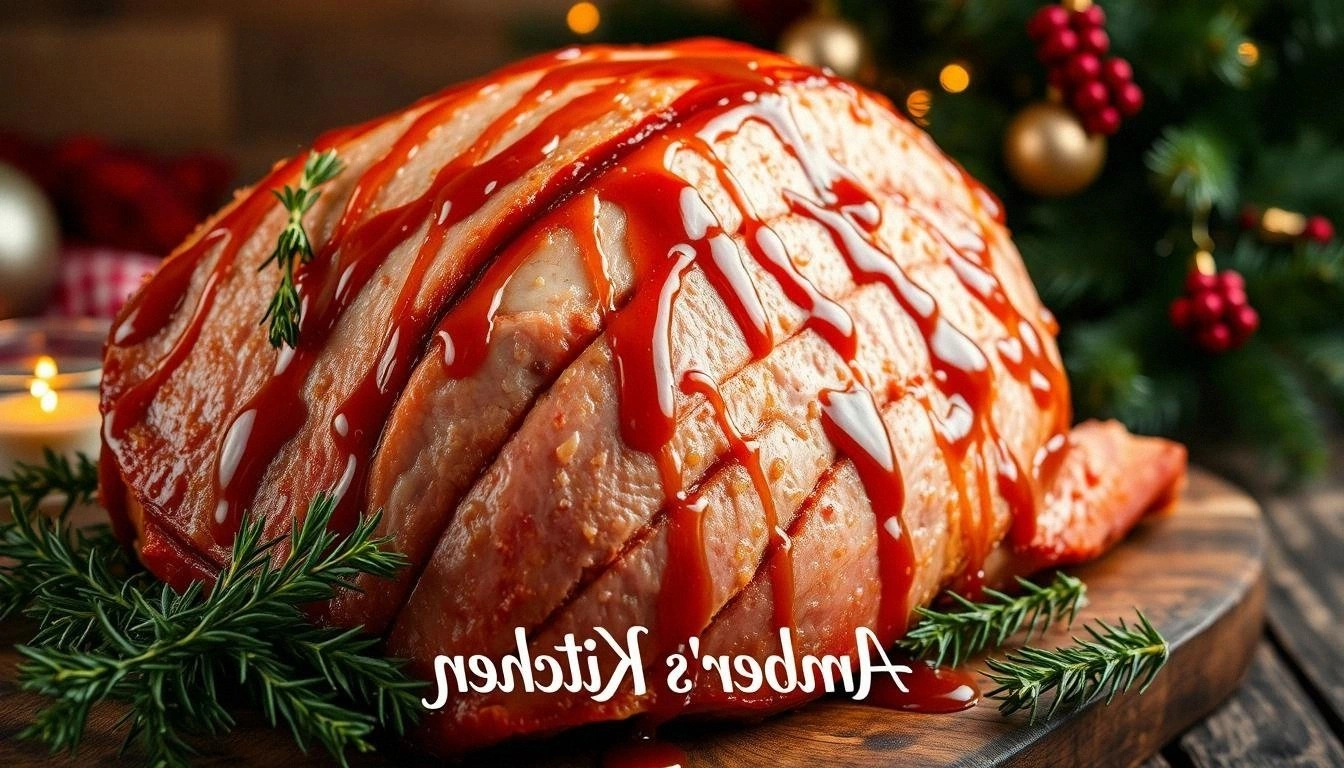
Picture this: the ham sits on a rack, its surface gleaming with a thick, amber glaze. The air fills with the sweet scent of brown sugar and the sharp bite of mustard, a contrast that tingles your palate even before you taste it. As the glaze simmers, it releases a caramelized aroma that makes the kitchen feel like a bakery. The sound of the glaze bubbling is music, and the sight of it thickening into a glossy glaze is pure anticipation. This isn’t just another recipe; it’s a ritual that turns a holiday dinner into an event. The moment the glaze is brushed on, the ham’s surface transforms, and the whole kitchen smells incredible.
I dare you to taste this and not go back for seconds. The glaze’s sweet, savory, slightly spicy profile is a flavor explosion that lingers on the tongue. The caramelized crust is crisp on the outside, giving way to juicy, tender ham inside. The blend of brown sugar, Dijon mustard, and a splash of pineapple juice creates a sticky, savory coating that caramelizes to a golden crust. Serve it warm over roasted veggies or on a crusty roll for a comforting family‑favorite meal that feels both festive and comforting. The glaze balances the ham’s savory depth, making each bite a melt‑in‑your‑mouth moment that will have guests begging for seconds.
The secret sauce that makes this version stand out is that I didn’t just follow a textbook recipe; I added a twist that turns the glaze into a flavor powerhouse. I’ll be honest — I ate half the batch before anyone else got to try it. Most recipes get this completely wrong, but here’s what actually works. The glaze is thick enough to cling, but thin enough to caramelize without burning. Picture the glaze coating the ham like velvet, each bite a burst of sweet, salty, and aromatic notes. Stay with me here — this is worth it.
What Makes This Version Stand Out
- Flavor: The blend of brown sugar, Dijon mustard, and pineapple juice creates a balanced sweet‑savory profile that caramelizes beautifully, turning the ham into a showstopper.
- Texture: The glaze forms a glossy, slightly crisp crust that snaps when you cut into it, revealing juicy, tender ham underneath.
- Ingredient Quality: Using fresh ginger and garlic, along with high‑grade Dijon mustard, elevates the glaze from ordinary to extraordinary.
- Simplicity: With just ten ingredients and a single pan, this glaze is quick and fuss‑free, making it perfect for last‑minute holiday dinners.
- Make‑ahead Potential: The glaze can be prepared up to 24 hours ahead and frozen, letting you focus on the main course on the day of the event.
- Crowd Reaction: Guests rave about the caramelized crust, and the glaze’s sweet‑savory balance keeps everyone coming back for seconds.
- Versatility: While perfect for ham, the glaze can also be used on pork tenderloin, chicken, or even roasted vegetables for a different twist.
- Presentation: The glossy finish gives the ham a restaurant‑grade appearance that impresses even the most discerning diners.
Alright, let's break down exactly what goes into this masterpiece.
Inside the Ingredient List
The Flavor Base
Brown sugar is the star of the show, providing a deep caramel sweetness that lingers long after the last bite. It’s the glue that binds the glaze together, and it caramelizes to create that glossy, almost molten finish. If you’re craving a lighter version, you can swap half the brown sugar for white sugar, but you’ll lose that complex molasses undertone. When selecting brown sugar, look for a tight, dark crumb; it indicates a higher molasses content and richer flavor.
Dijon mustard is the sharp, tangy backbone that cuts through the sweetness of the sugar. It adds depth and a subtle heat that balances the glaze’s richness. If you’re not a fan of mustard, you can use yellow mustard, but the flavor profile will shift to a milder, sweeter taste. For an extra kick, a pinch of cayenne pepper can be added to the mustard mixture.
Apple cider vinegar brings acidity that brightens the glaze, preventing it from becoming too heavy. It also helps the glaze set into a glossy sheen. If you prefer a fruitier note, orange juice can replace the vinegar, adding citrus brightness and a subtle sweetness.
The Texture Crew
Honey or maple syrup adds natural sweetness and helps the glaze caramelize evenly. It also contributes to the sticky texture that makes the glaze cling to the ham. If you’re looking for a vegan option, maple syrup is a great substitute. A tablespoon of honey is enough to give the glaze a silky finish.
Soy sauce brings umami and a subtle saltiness that deepens the glaze’s flavor. It also adds a hint of saltiness that balances the sugar’s sweetness. For a gluten‑free version, tamari can replace soy sauce without compromising flavor. Soy sauce also helps the glaze set into a glossy coating.
Ground cloves add a warm, spicy aroma that elevates the glaze’s complexity. They’re a staple in holiday cooking and complement the sweetness of the sugar. Use them sparingly; a single pinch is enough to create a fragrant, aromatic glaze.
The Unexpected Star
Fresh ginger, grated, introduces a zesty, slightly peppery note that cuts through the sweetness and adds a subtle kick. Ginger also contributes to the glaze’s glossy texture, creating a smooth finish. If you don’t have fresh ginger, ginger powder works, but it’s less vibrant.
Fresh garlic, minced, adds a robust, savory depth that enhances the overall flavor profile. It provides a subtle bite that contrasts with the sweet glaze, creating a balanced taste. A small clove is enough; too much garlic can overpower the glaze.
The Final Flourish
Pineapple juice brings a tropical sweetness that complements the brown sugar, creating a glaze that’s both sweet and slightly tangy. It also helps the glaze caramelize to a golden crust. If you prefer a less sweet version, you can replace pineapple juice with a splash of water, but the glaze will lose its tropical undertone.
Everything’s prepped? Good. Let’s get into the real action.
The Method — Step by Step
- Preheat your oven to 350°F (175°C). While the oven heats, place the ham on a rack in a roasting pan, fat side up. This allows the glaze to drip down the sides, creating a beautiful caramelized coating. The oven should be fully preheated to ensure even cooking. This step sets the foundation for a perfectly glazed ham.
- In a small saucepan, combine brown sugar, Dijon mustard, honey, soy sauce, apple cider vinegar, and pineapple juice. Whisk until the sugar dissolves completely. This mixture should be smooth and free of lumps. Bring the mixture to a gentle simmer over medium heat, stirring occasionally. The glaze will begin to thicken as it heats.
- Add the ground cloves, grated ginger, minced garlic, and black pepper to the saucepan. Stir well to incorporate all the aromatics. The spices should release their aromas, filling the kitchen with a warm, spicy scent. This is the moment where the glaze’s flavor profile starts to deepen. Let it simmer for another 3–5 minutes.
- Remove the glaze from the heat and let it cool slightly. The glaze should still be pourable but thick enough to coat the ham. While it cools, you can brush the ham with a thin layer of olive oil to help the glaze stick. This step ensures the glaze will adhere and caramelize properly.
- Brush the ham generously with the glaze, covering all surfaces. Use a basting brush to spread the glaze evenly, ensuring every corner gets a sweet, savory coating. The glaze should cling to the ham like a second skin. Let the ham rest for 10 minutes before baking; this allows the glaze to set.
- Place the glazed ham in the preheated oven and bake for 20–25 minutes, or until the internal temperature reaches 145°F (63°C). The glaze should caramelize, forming a glossy, slightly crisp crust. Check the glaze every 5 minutes to ensure it doesn’t burn. The final result should be a golden, caramelized ham that looks like a work of art.
- While the ham is baking, reduce the remaining glaze in a small saucepan over low heat until it thickens into a syrupy consistency. This will be your finishing sauce. The glaze should reduce to about half its original volume, creating a thick, glossy sauce that’s perfect for serving.
- Remove the ham from the oven and let it rest for 10 minutes before slicing. Resting allows the juices to redistribute, ensuring every bite is moist and flavorful. Slice the ham against the grain for maximum tenderness. Plate the slices and drizzle the reduced glaze over them for an extra burst of flavor.
- Serve the ham with your favorite sides: roasted potatoes, steamed green beans, or a fresh salad. The glaze’s sweet‑savory profile pairs beautifully with hearty, earthy sides. Don’t forget to offer extra glaze on the side for guests who want an extra coating. This dish is sure to become a family favorite.
That's it — you did it. But hold on, I've got a few more tricks that'll take this to another level.
Insider Tricks for Flawless Results
The Temperature Rule Nobody Follows
Many people bake ham at 400°F, thinking it will cook faster. In reality, a lower temperature of 350°F allows the glaze to caramelize evenly without burning. The slower heat ensures the ham stays juicy and the glaze forms a glossy crust. I tried 400°F once, and the glaze charred before the ham cooked through. Keep the temperature steady, and the result will be a perfectly glazed masterpiece.
Why Your Nose Knows Best
If the glaze starts to smell like burnt sugar, it’s time to reduce the heat. The scent of caramelizing sugar is a great indicator that the glaze is nearing perfection. A quick whisk can help redistribute the sugar, preventing clumps from forming. Trust your nose; it’s the best guide to avoid a burnt glaze.
The 5-Minute Rest That Changes Everything
Letting the glazed ham rest for 10 minutes after baking is essential. This short pause allows the juices to redistribute, keeping the meat moist. It also gives the glaze a chance to set, creating that perfect glossy finish. Skipping this step results in a dry ham with a loose glaze. Remember: a rested ham is a happy ham.
Use a Basting Brush with a Long Handle
A long‑handled brush makes it easier to reach the ham’s underside, ensuring even coating. The longer handle also reduces splatter, keeping your kitchen cleaner. If you don’t have a long handle, a standard brush works, but you’ll have to tilt the pan more often. A good brush is a small but mighty tool in any kitchen.
Keep a Small Bowl of Water Nearby
If the glaze starts to thicken too quickly, dip your brush into a small bowl of water to thin it out. This simple trick keeps the glaze smooth and prevents it from drying on the pan. A watery glaze also helps the glaze spread more evenly over the ham. Water is a silent hero in many cooking stories.
Creative Twists and Variations
This recipe is a playground. Here are some of my favorite ways to switch things up:
Maple Glazed Pork Tenderloin
Swap the ham for pork tenderloin and replace the pineapple juice with maple syrup. The result is a sweet, smoky pork that’s perfect for a fall dinner. The glaze caramelizes beautifully on the tenderloin, creating a glossy finish. Serve it with sautéed apples for a complete fall meal.
Spicy Chipotle Ham
Add a tablespoon of chipotle in adobo sauce to the glaze for a smoky, spicy kick. The chipotle adds depth and a subtle heat that contrasts with the sweet glaze. This variation is ideal for those who love a bit of spice. The smoky flavor pairs well with corn on the cob.
Herb‑Infused Glaze
Introduce fresh rosemary and thyme into the glaze for an aromatic, herbal twist. The herbs bring a fresh, earthy note that balances the sweetness. This version is great for a rustic, country‑style dinner. The herb flavors pair wonderfully with roasted root vegetables.
Asian Fusion Glaze
Use hoisin sauce and sesame oil instead of honey and soy sauce for an Asian twist. The glaze takes on a deep, savory sweetness that pairs well with steamed rice. Add a splash of rice vinegar for brightness. This variation is a crowd‑pleaser at dinner parties.
Low‑Sugar Glaze
Reduce the brown sugar by half and add stevia or monk fruit sweetener. The glaze will still caramelize but with a lower glycemic impact. This version is great for those watching their sugar intake. The flavor remains rich and satisfying.
Vegan Glaze
Use maple syrup, soy sauce, and a splash of tamari to create a vegan-friendly glaze. Replace the honey with maple syrup for a plant‑based sweetener. The glaze remains thick and glossy, perfect for a vegan holiday spread. Pair it with roasted vegetables for a complete meal.
Storing and Bringing It Back to Life
Fridge Storage
Store leftover glaze in a sealed jar in the refrigerator for up to five days. The glaze will thicken slightly as it cools, but it remains perfectly usable. When reheating, add a splash of water or broth to restore its pourable consistency. Keep the jar in the back of the fridge to maintain a stable temperature.
Freezer Friendly
Freeze the glaze in an airtight container for up to three months. When ready to use, thaw it in the refrigerator overnight. The glaze may separate slightly; give it a quick stir before reheating. Freezing preserves the flavor profile and extends the glaze’s shelf life.
Best Reheating Method
Reheat the glaze on low heat, stirring frequently until it reaches the desired consistency. Add a tiny splash of water before reheating; it steams back to perfection and prevents the glaze from drying out. The glaze should be warm and silky, ready to coat your favorite meats.