Okay, ready for the game‑changer? I’m about to walk you through every single step—by the end, you’ll wonder how you ever made candy any other way. This isn’t just a recipe; it’s a full‑on sensory adventure that will brighten your day, your kitchen, and maybe even your mood. Let’s get started, because the magic is about to happen.
What Makes This Version Stand Out
- Taste: The candy delivers a bright citrus punch balanced by caramel‑sweet depth, creating a flavor profile that feels like sunshine wrapped in a hug.
- Texture: It’s chewy enough to linger, yet firm enough to snap cleanly when you bite, giving you that satisfying “pop” without turning into a gum.
- Simplicity: Only four ingredients and a single pot are needed, so you won’t need a pantry raid to pull this off.
- Uniqueness: The two‑stage sugar method prevents crystallization, a common pitfall that turns candy into a grainy mess.
- Crowd Reaction: Guests often claim they’ve never tasted anything like it, and they’ll be the first to ask for the recipe (even if you’re not ready to share).
- Ingredient Quality: Fresh oranges provide natural oils that artificial flavorings simply can’t match, and they add a subtle bitterness that balances the sweetness.
- Cooking Method: The gentle simmer and quick cooling lock in flavor while giving the candy a glossy finish that looks as good as it tastes.
- Make‑Ahead Potential: This candy stores beautifully for weeks, meaning you can prep it ahead of holidays, parties, or even a rainy day snack.
Inside the Ingredient List
The Flavor Base
Fresh oranges are the heart and soul of this candy. Their zest is packed with volatile oils that burst into aromatic fireworks when heated, infusing the syrup with a citrusy perfume that no extract can replicate. If you skimp on the zest, you’ll end up with a candy that tastes like sweet water, missing that essential zing. When selecting oranges, go for ones that feel heavy for their size—those are the juiciest. If you can’t find fresh oranges, a high‑quality orange zest packet will do, but the flavor won’t be as vibrant.
The Sweet Backbone
Granulated sugar is the structural backbone of the candy. The first two cups create a syrup that will caramelize without burning, while the half‑cup added at the end gives the candy a delicate dusting that prevents sticking. If you substitute brown sugar, you’ll introduce molasses notes that clash with the orange. And if you skip the second sugar addition, the candy will cling to every surface like a clingy ex. For the best results, use fine, white granulated sugar; it dissolves quickly and yields a smoother texture.
The Texture Crew
Water is the silent hero that controls the syrup’s consistency. Too much water, and the candy will be gummy; too little, and it will harden into brittle shards. The one‑cup measurement is calibrated to create a soft‑ball stage syrup—think of a marshmallow that’s just about to set. If you’re at a high altitude, you might need to add a tablespoon more water to compensate for the lower boiling point.
The Final Flourish
A final dusting of granulated sugar not only prevents the candy from sticking together but also adds a subtle crunch that contrasts beautifully with the chewy interior. This step is often overlooked, leading to candy that clumps into a sticky mess. If you want an extra touch of sparkle, a light sprinkling of powdered orange zest can elevate the visual appeal and intensify the aroma. Remember, the smallest details make the biggest impact.
Everything's prepped? Good. Let’s get into the real action…
The Method — Step by Step
First, zest the three large oranges using a microplane, being careful to avoid the white pith which can taste bitter. As soon as the zest hits the bowl, you’ll notice a citrus perfume that’s almost intoxicating. Set the zest aside, then juice the oranges until you have about one cup of fresh orange juice. This juice will later be folded into the syrup, giving it a bright, natural flavor that no artificial essence can match.
In a medium‑sized stainless steel saucepan, combine the two cups of granulated sugar with one cup of water. Turn the heat to medium‑high and stir gently until the sugar dissolves. Once dissolved, stop stirring; let the mixture come to a gentle boil. You’ll hear a soft, steady bubbling—this is the sugar reaching the soft‑ball stage, the perfect point for candy.
When the syrup reaches 240°F, quickly whisk in the orange zest. The zest will sizzle and release its oils, creating a fragrant steam that fills the kitchen like a citrus‑scented candle. Keep whisking for about 30 seconds; you’ll notice the mixture turning a deeper amber hue, indicating the zest has fully infused.
Now, slowly pour in the freshly squeezed orange juice while the syrup is still bubbling. The mixture will momentarily fizz—this is the carbonation from the juice reacting with the hot sugar, a harmless but exciting visual cue. Stir continuously for another two minutes; the candy should thicken slightly and develop a glossy sheen.
Once the syrup has thickened and the aroma is unmistakably orange, remove the pan from the heat. Let it sit for 30 seconds, then stir in the remaining half‑cup of granulated sugar. This final sugar addition prevents the candy from sticking to the parchment and adds a subtle crunch. You’ll see the sugar dissolve into the warm syrup, creating a slightly grainy texture that will smooth out as it cools.
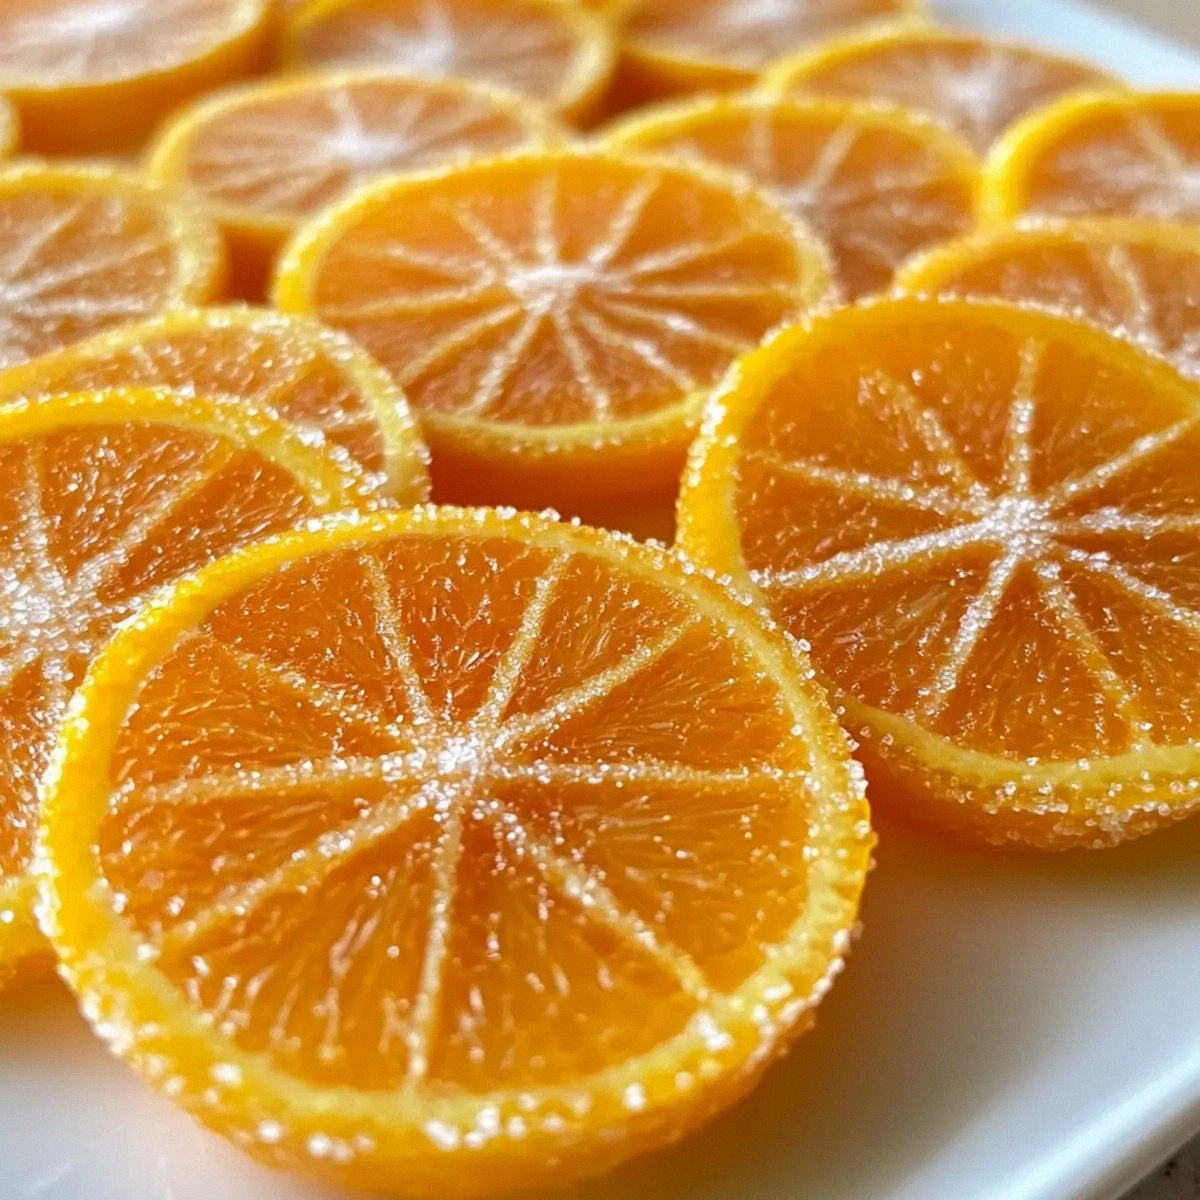
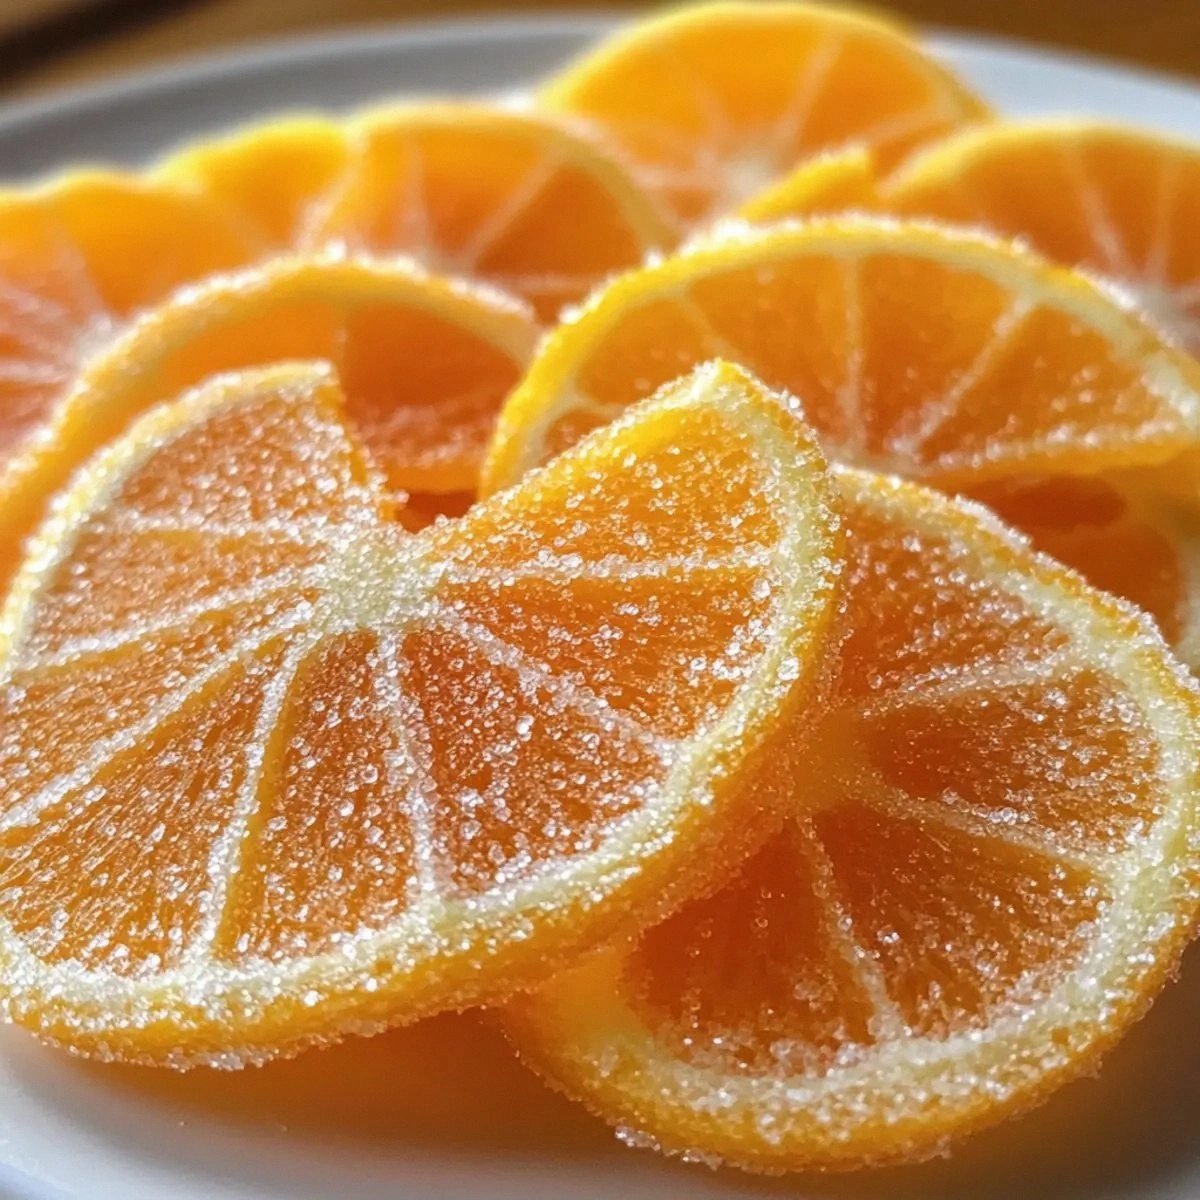
Prepare a baking sheet lined with parchment paper and lightly greased with a neutral oil. Using a spoon, drop rounded tablespoons of the syrup onto the sheet, spacing them about an inch apart. The drops will spread slightly, forming irregular, glossy discs that look like miniature suns.
Allow the candy to cool at room temperature for 15‑20 minutes. As it cools, it will firm up but remain slightly pliable—think of the perfect gummy bear texture. If you’re impatient, you can place the sheet in the fridge for 5 minutes, but beware: rapid cooling can cause the candy to crack.
Once fully set, gently peel the candies off the parchment. Dust each piece with a light sprinkling of extra granulated sugar to prevent them from sticking together. Store them in an airtight container, and you’ll have a batch of sunshine ready to brighten any day. That sizzle when it hits the pan? Absolute perfection.
Insider Tricks for Flawless Results
The Temperature Rule Nobody Follows
Most home cooks eyeball the syrup, but a candy thermometer is the real MVP. Hitting exactly 240°F guarantees a chewy texture without the dreaded graininess. If you don’t have a thermometer, watch for the “soft‑ball” test: drop a small spoonful into a glass of cold water; it should form a soft, flexible ball you can roll between your fingers. I once tried to skip this step—let’s just say the candy turned into a hard, rock‑like surprise.
Why Your Nose Knows Best
Your sense of smell is a more reliable indicator than any timer. When the zest releases its oils, you’ll notice a bright, citrusy puff that fills the kitchen. If the aroma starts to smell burnt or overly caramelized, you’re past the sweet spot. Trust that nose; it’s your built‑in quality control.
The 5‑Minute Rest That Changes Everything
After you pour the syrup onto the parchment, let it sit untouched for five minutes before moving it. This pause lets the surface tension settle, preventing the candy from spreading too thin. Skipping this rest leads to uneven pieces that are either too thin and crisp or too thick and gummy.
Cool‑Down Speed Trick
If you’re in a hurry, place the baking sheet on a cooling rack set over a shallow pan of ice water. The indirect chill speeds up the setting process without shocking the candy, which can cause cracks. I’ve used this trick for party prep and it’s a lifesaver.
The Sugar Dusting Secret
Instead of tossing the candies in a bowl of sugar, lightly dust them using a fine mesh sieve. This technique ensures an even coating and prevents the sugar from clumping on one side. The result is a professional‑looking finish that even the most critical guests will admire.
Creative Twists and Variations
This recipe is a playground. Here are some of my favorite ways to switch things up:
Spiced Orange Delight
Add a pinch of ground cinnamon and a dash of nutmeg to the syrup just before you stir in the orange juice. The warm spices complement the citrus, turning the candy into a cozy treat perfect for autumn evenings.
Chocolate‑Coated Citrus
Once the candy has set, dip each piece halfway into melted dark chocolate. The bitter chocolate contrasts the bright orange, creating a sophisticated bite that’s ideal for gifting.
Ginger‑Zest Fusion
Grate a small knob of fresh ginger into the syrup alongside the orange zest. The ginger adds a subtle heat that makes the candy zing on the palate, perfect for those who love a little kick.
Mint‑Infused Refresh
Add a few torn fresh mint leaves to the syrup during the final simmer. The mint will infuse a cool aftertaste that balances the sweetness, making the candy feel like a summer refresher.
Nutty Crunch
Stir in a tablespoon of finely chopped toasted almonds just before pouring the syrup onto the parchment. The nuts add a pleasant crunch and a nutty aroma that pairs beautifully with orange.
Storing and Bringing It Back to Life
Fridge Storage
Place the candies in an airtight glass jar and store them in the refrigerator for up to two weeks. The cool environment preserves the chewiness and prevents the sugar from crystallizing. Before serving, let them sit at room temperature for 10 minutes to regain their full flavor.
Freezer Friendly
If you want to keep them for months, layer the candies between sheets of parchment in a freezer‑safe container. They’ll stay fresh for up to three months. When you’re ready to enjoy them, thaw at room temperature and give them a quick roll in fresh sugar to revive the coating.
Best Reheating Method
To bring the candy back to its original glossy shine, gently warm it in a microwave‑safe bowl for 10‑15 seconds, then add a tiny splash (about a teaspoon) of water. Stir briefly; the steam will re‑hydrate the candy, restoring its perfect texture without making it sticky.