I still remember the day I declared war on mediocre muffins. It was a rainy Tuesday morning, and I had just bitten into what promised to be a bakery-fresh cranberry orange muffin that tasted like cardboard with red polka dots. The cranberries had sunk to the bottom like little tart submarines, the orange flavor was so faint it could have been a rumor, and don't even get me started on the texture — dense enough to patch drywall. That's when I marched into my kitchen, flour flying like snow in a blizzard, determined to create the cranberry orange muffin that would make grown adults weep tears of joy.
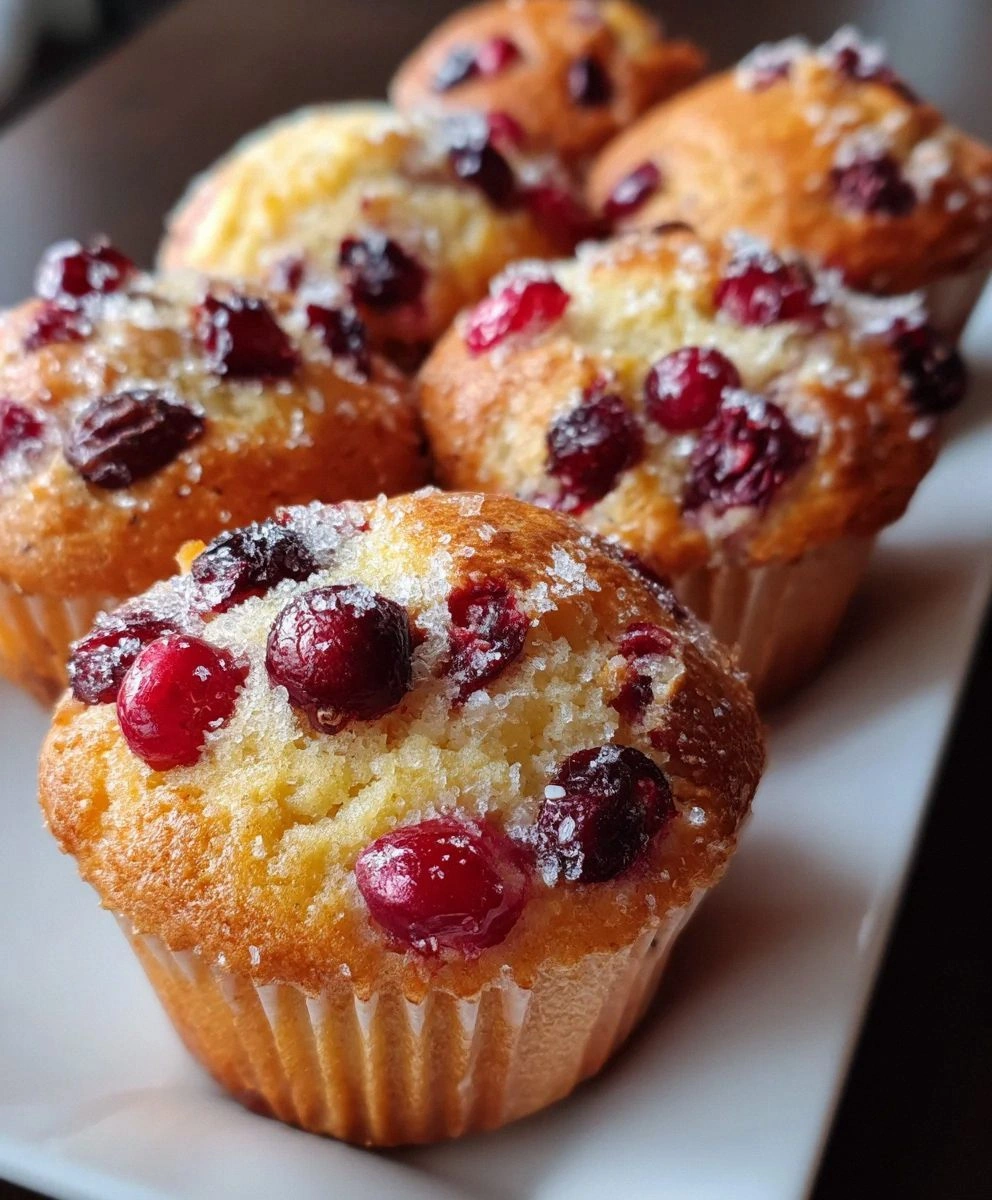
After seventeen batches, three sticky disasters, and one incident involving my smoke detector serenading the neighborhood, I finally cracked the code. The muffin I'm about to share with you isn't just another recipe — it's a citrus-scented revelation that will ruin all other muffins for you forever. Picture this: a dome so perfectly domed it looks like it belongs on a magazine cover, with a tender crumb that melts on your tongue like butter in July. The cranberries burst with tart sunshine, while ribbons of orange essence weave through every bite like liquid gold.
Here's where most recipes get it completely wrong: they treat cranberries like regular berries and orange like an afterthought. Cranberries are divas — they demand special treatment, a little flour-coating pampering to keep them suspended in the batter like rubies in velvet. And orange? Orange isn't just a flavor, it's an experience that starts from the moment you zest that first bright peel and your kitchen fills with the promise of what's to come. The combination creates a muffin that's simultaneously cozy and electrifying, like wrapping yourself in a warm blanket while sticking your tongue on a battery.
I dare you to taste these warm from the oven and not immediately go back for seconds. I'll be honest — I ate half the batch before anyone else got to try them, standing over my kitchen counter at 6 AM, coffee in hand, crumbs cascading down my shirt like delicious little snowflakes. The secret lies in a technique so simple yet so game-changing that once you try it, you'll wonder how you ever made it any other way. Picture yourself pulling these golden beauties from your oven, the whole kitchen smelling like a winter morning in Florida, your family drifting in like cartoon characters following a scent trail.
What Makes This Version Stand Out
Taste Explosion: These muffins don't whisper orange — they sing it in four-part harmony while the cranberries provide a tart counterpoint that makes your taste buds do a happy dance. The balance is so perfect that neither flavor overpowers the other, creating a symphony of sweet and tart that will make you close your eyes involuntarily with each bite.
Cloud-Like Texture: We're talking about a crumb so tender it practically dissolves on your tongue, with just enough structure to hold those gorgeous cranberries in suspension. The secret? A combination of melted butter for richness and the perfect ratio of leavening agents that creates lift worthy of a hot air balloon.
Zero Fuss Technique: While other recipes demand you fold like a French pastry chef with a PhD in gentleness, this batter comes together in one bowl with a sturdy spoon and zero anxiety. You don't need to bring ingredients to room temperature or perform any kitchen gymnastics — just mix and magic happens.
Height Matters: These muffins rise like they're trying to touch the oven ceiling, creating those gorgeous bakery-style domes that make you look like a professional. The trick involves starting at a higher temperature that sets the edges quickly, then dropping it down to finish baking evenly.
Crowd Psychology: I've watched people who claim they "don't really like muffins" inhale three of these without coming up for air. They're the recipe that gets requested at every brunch, the one neighbors smell from across the street and suddenly need to borrow sugar they don't need.
Seasonal Flexibility: While cranberries scream holidays, these work year-round with frozen cranberries, making them your go-to impressive breakfast for houseguests or your secret weapon for office potlucks when you want everyone to think you're a baking genius.
Make-Ahead Magic: The batter keeps beautifully in the fridge for up to three days, so you can have fresh muffins every morning without the morning math. Just scoop, bake, and bask in the glory of being the person who has fresh-baked goods on a Tuesday.
Inside the Ingredient List
The Flavor Foundation
All-purpose flour isn't just the structural backbone of these muffins — it's the canvas that lets the cranberry-orange masterpiece shine. I use the regular stuff from the grocery store, nothing fancy, because we're not trying to impress anyone with artisanal flour stories. The protein content is perfectly balanced to give us tender muffins that still have enough strength to hold those gorgeous domes. Skip the cake flour here, because we need a bit more backbone, and bread flour would make these tougher than your mother-in-law's judgment.
Granulated sugar does triple duty: it sweetens (obviously), but it also tenderizes the crumb by interfering with gluten development and helps create that gorgeous golden-brown crust through caramelization. Don't even think about reducing the sugar — these aren't diet muffins, they're celebration muffins. If you're absolutely desperate, you can swap in brown sugar for a deeper, more caramel-like flavor that plays beautifully with the orange.
The Texture Crew
Baking powder and baking soda work together like a tag team of lift champions. The baking powder provides most of the rise, creating those beautiful air pockets that make each bite feel like eating a citrus-scented cloud. The baking soda neutralizes the acidity in the orange juice and reacts with it to create additional lift — skip either one and your muffins will have the density of hockey pucks. Freshness is absolutely critical here; if you can't remember when you bought your leavening agents, treat yourself to new ones.
That single large egg is the unsung hero of texture, providing structure, richness, and helping emulsify the batter so everything bakes evenly. It's like the project manager of the ingredient world — not flashy, but nothing works without it. Make sure you're using a large egg, not medium or extra-large, because baking is chemistry and size matters more than you'd think.
The Flavor Amplifiers
Orange zest is where we're going to extract maximum flavor with minimum effort. Those tiny flecks of orange oil contain more concentrated flavor than the juice alone could ever provide. When zesting, only take the bright orange part — the white pith underneath tastes like bitter disappointment and regret. A microplane zester is worth its weight in gold here, creating feathery strands that distribute through the batter like orange confetti.
Fresh orange juice brings moisture and a bright, clean citrus flavor that bottled juice simply can't match. If you must use store-bought, look for the not-from-concentrate stuff, but honestly, squeezing two oranges takes less time than finding your car keys and makes the flavor exponentially better. The acid in the juice also helps activate our baking soda, creating a chemical reaction that's like a tiny science experiment in your mixing bowl.
The Star Players
Fresh cranberries are the divas of the fruit world — tart, temperamental, and absolutely magnificent when treated right. They provide explosive pockets of bright flavor that make these muffins sing, creating little bursts of tang that cut through the sweetness like a knife through butter. The key is coating them in flour before folding them in, which helps them defy gravity and stay suspended throughout the batter instead of sinking like stones to the bottom. If fresh aren't available, frozen works beautifully — just don't thaw them first or they'll bleed purple streaks through your beautiful batter.
Butter brings richness and flavor that oil simply can't match, creating those crave-worthy edges that turn golden and slightly crisp while the interior stays tender. Make sure it's softened but not melted — we're creaming it with the sugar to incorporate air, not making soup. Unsalted butter gives you control over the salt level, because nobody wants surprise salty muffins, no matter how good they are.
The Optional Crowd-Pleasers
Chopped nuts add a delightful crunch and toasty flavor that transforms these from good muffins to legendary status. Pecans are my go-to because their buttery flavor plays beautifully with both the orange and cranberries, but walnuts work if that's what you have. Toast them first in a dry pan until they smell like heaven and your kitchen smells like a nutty paradise — this extra step takes five minutes but adds layers of flavor that will make people wonder what your secret is.
That tiny pinch of salt is the invisible hand that makes all the other flavors pop, enhancing the sweetness and preventing these from tasting one-dimensional. It's like the bass player in a band — you don't always notice it's there, but you'd definitely notice if it was missing. Don't skip it, don't increase it, just trust that this tiny amount is doing heavy lifting behind the scenes.
Everything's prepped? Good. Let's get into the real action...
The Method — Step by Step
- Start by preheating your oven to 425°F — yes, you read that right, we're starting hot to create those gorgeous domes. Line a 12-cup muffin tin with paper liners or spray thoroughly with non-stick spray, because nothing ruins a beautiful muffin like leaving half of it welded to the pan. In a medium bowl, whisk together your flour, baking powder, baking soda, and salt, then set aside. This dry mix needs a moment to get acquainted while we work on the wet ingredients, and whisking ensures the leavening agents distribute evenly so you don't get one muffin that rises like a skyscraper and eleven that sit there like sad little pucks.
- Now for the fun part: in a large bowl, cream together your softened butter and sugar until the mixture looks pale and fluffy, about 2-3 minutes if you're using a hand mixer or 4-5 minutes with enthusiastic arm power. This isn't just busy work — you're incorporating air that will help create lift, and the sugar crystals cutting through the butter create tiny pockets that will expand during baking. The mixture should look like pale yellow clouds and smell like sweet promise. Don't rush this step, because this is where we're building the foundation for texture that will make people think you went to pastry school.
- Beat in your egg until completely incorporated, then add the orange zest and juice, watching as the mixture transforms into a sunshine-colored dream. The batter might look slightly curdled at this point, but don't panic — that's just the acid from the orange juice doing its thing with the butter. Keep mixing until everything comes together in a cohesive, fragrant mass that makes you want to dive in face-first. This is the moment when your kitchen starts smelling like a Florida orange grove, and any family members within a three-house radius will suddenly develop urgent reasons to visit your kitchen.
- Time for the flour choreography: add your dry ingredients in three additions, mixing just until the flour disappears. This is not the time to unleash your inner bodybuilder — overmixing develops gluten and creates tough muffins that could double as paperweights. The batter should be thick but still spoonable, with a texture like soft-serve ice cream that's been left out for ten minutes. If you've mixed correctly, you'll still see a few tiny flour streaks, which is perfect because they'll disappear in the next step.
- Gently fold in your flour-coated cranberries and chopped nuts using a spatula, making figure-eight motions that show respect for the delicate batter. The cranberries should be evenly distributed but not pulverized — we're making muffins, not cranberry paint. Take a moment to appreciate the jewel-like appearance of those berries against the pale batter, like rubies scattered across golden sand. If any berries are stubbornly clinging together, separate them gently with your spatula like a baker-turned-marriage-counselor.
- Using a large cookie scoop or two spoons, divide the batter among your muffin cups, filling each about three-quarters full. Don't worry about being too precise — rustic is part of the charm, and any batter that touches the pan edges will create those coveted crispy edges that serious muffin aficionados fight over. The batter should mound slightly in the center, creating a gentle dome that will rise into a beautiful peak during baking. If you have extra batter (and you probably will), resist the urge to overfill or you'll end up with mushroom-shaped muffins that merge together like conjoined twins.
- Slide your tin into the preheated oven and bake for 5 minutes at 425°F — this blast of heat sets the edges and starts the rising action. Without opening the door, reduce the temperature to 375°F and continue baking for 15-18 minutes more, until the muffins are golden brown and a toothpick inserted in the center comes out with just a few moist crumbs. The tops should spring back when gently pressed, and the edges will be pulling away from the pan like they're trying to escape to muffin freedom. Your kitchen will smell like an orange-cranberry candle factory exploded in the best possible way.
- Remove from the oven and let cool in the pan for 5 minutes — this brief rest allows the muffins to firm up enough to remove without falling apart like a house of cards. Run a butter knife around the edges if necessary, then transfer to a wire rack to cool completely, or at least until you can handle them without burning your fingerprints off. The muffins will be slightly fragile while warm, so handle with the same care you'd give a sleeping baby or a vintage wine collection. If you can resist eating them immediately, the flavors actually develop and intensify as they cool, but I won't judge if you burn your tongue on the first one — it's practically a rite of passage.
- For the ultimate experience, split one warm muffin and watch the steam escape like a fragrant whisper of orange-scented secrets. Slather with butter if you're feeling decadent, or enjoy them plain to appreciate the perfect balance of flavors. Store any leftovers (ha!) in an airtight container at room temperature for up to three days, though they're at their peak within the first 24 hours when the edges still have a slight crispness that gives way to a tender, moist interior studded with jewel-like cranberries.
That's it — you did it. But hold on, I've got a few more tricks that'll take this to another level...
Insider Tricks for Flawless Results
The Temperature Rule Nobody Follows
Here's the thing about muffin success — temperature isn't just about the oven setting, it's about ingredient temperature too. Your butter should be soft enough to leave an imprint when pressed but not melty, your egg should lose the refrigerator chill, and even your orange juice benefits from not being ice-cold straight from the fruit. When everything starts at roughly the same temperature, they incorporate more easily and create a smoother batter that bakes evenly. I learned this the hard way when I made muffins with cold eggs straight from the fridge and ended up with butter pebbles that refused to cooperate, creating pockets of pure fat that tasted like disappointment.
Why Your Nose Knows Best
Trust your sense of smell more than the timer — when these muffins are perfectly done, your kitchen will fill with an intoxicating aroma of orange and butter that's so powerful it should come with a warning label. The scent changes subtly about two minutes before they're ready, developing deeper, more complex notes that signal the Maillard reaction is working its browning magic. A friend once tried skipping this sensory checkpoint and pulled her muffins out too early, ending up with pale, doughy centers that tasted like flour paste with cranberry chunks. Don't be like my friend — let your nose guide you to muffin nirvana.
The 5-Minute Rest That Changes Everything
After baking, resist the urge to immediately yank those beauties from the pan — they need those five minutes to finish setting from residual heat. During this crucial rest, the starches continue to gelatinize and the structure firms up, preventing the dreaded muffin collapse that leaves you with sad, sunken centers. This is when you can brew your coffee or set the table, knowing that patience will be rewarded with muffins that hold their shape and have that professional bakery appearance. I've seen people skip this step and end up with muffins that look like they've been through a war zone, all broken and misshapen despite tasting perfectly fine.
The Cranberry Distribution Secret
Beyond flour-coating your cranberries, the real secret to perfect distribution lies in how you add them to the batter. Instead of dumping them all in at once, sprinkle them over the surface like you're garnishing a salad, then fold just three or four times before adding more. This creates layers of fruit throughout the muffin rather than clumps that leave some bites fruit-free and others overwhelming. It's like creating a treasure map where X marks the spot on every bite, ensuring that each mouthful contains the perfect ratio of tart cranberry to tender cake.
Creative Twists and Variations
This recipe is a playground. Here are some of my favorite ways to switch things up:
The Tropical Vacation Version
Swap the orange for a combination of lime zest and juice, replace cranberries with dried mango chunks soaked in rum, and add shredded coconut to the batter. The result tastes like a Caribbean sunrise in muffin form, with bright lime notes that dance with the tropical fruit and coconut flakes that toast to golden perfection on top. These are especially dangerous because they make everyone who eats them start daydreaming about beach vacations and might result in impulsive flight bookings.
The Decadent Chocolate Orange Edition
Add 1/2 cup of mini chocolate chips to the batter and replace 1/4 cup of flour with cocoa powder for a sophisticated twist that tastes like those fancy chocolate orange candies but in breakfast form. The chocolate melts into little pockets of richness that complement both the orange and cranberries, creating a flavor profile that's reminiscent of a chocolate-covered cranberry truffle. These disappear fastest at brunch gatherings, so consider making a double batch if you want any for yourself.
The Spiced Winter Warmer
Add 1 teaspoon of ground cardamom and 1/2 teaspoon of cinnamon to the dry ingredients, creating a warming spice blend that makes these taste like Christmas morning regardless of the season. The cardamom adds an exotic note that elevates the orange to new heights, while the cinnamon provides cozy warmth that makes people want to curl up with these muffins and a hot beverage. They're like edible hygge, perfect for those days when you need comfort in carbohydrate form.
The Lemon-Blueberry Summer Remix
Replace orange with lemon zest and juice, swap cranberries for fresh blueberries, and add 1 tablespoon of poppy seeds for texture. The result is a bright, sunny muffin that tastes like July even in the dead of winter, with blueberries that burst into sweet-tart pockets of flavor and poppy seeds that add a pleasant crunch. These are the muffins you make when you need to taste sunshine and remember that winter is temporary.
The Streusel-Topped Showstopper
Create a quick streusel with 1/4 cup each of flour, brown sugar, and butter, plus 1/2 teaspoon of cinnamon, mixed until crumbly. Sprinkle over each muffin before baking for a crunchy, sweet topping that adds textural contrast and makes these look like they came from an upscale bakery. The streusel toasts to golden perfection, creating a crown for each muffin that shatters delicately when bitten, revealing the tender interior like opening a present.
The Gluten-Free Game Changer
Replace the all-purpose flour with a 1:1 gluten-free baking blend and add 1 tablespoon of orange juice to compensate for the thirsty nature of gluten-free flours. The result is so good that gluten-eating friends won't know the difference — I've tested this extensively on unsuspecting guests who polished off the entire batch and asked for the recipe. The key is using a blend that contains xanthan gum, which mimics the structure that gluten provides and keeps these from crumbling like your resolve on a diet.
Storing and Bringing It Back to Life
Room Temperature Storage
These muffins keep beautifully at room temperature in an airtight container for up to three days, though they're at their peak within the first 48 hours when the contrast between crispy edges and tender interior is most pronounced. Store them in a single layer if possible, or separate layers with parchment paper to prevent the tops from sticking together and creating muffin casualties when separated. If your kitchen runs warm, consider adding a paper towel to the container to absorb excess moisture and prevent the tops from getting sticky. Whatever you do, don't refrigerate them — cold is the enemy of muffin texture, turning them dense and sad faster than you can say "leftovers."
Freezer Friendly Method
These freeze like champions for up to three months, making them perfect for meal prep or emergency breakfast situations. Let them cool completely, then wrap individually in plastic wrap before placing in a freezer bag — this double protection prevents freezer burn and flavor transfer from whatever else is lurking in your freezer. To thaw, leave at room temperature for about an hour, or microwave for 20-30 seconds if you're impatient (and who isn't when faced with the promise of a warm muffin?). Frozen muffins are also excellent sliced in half and toasted, which revives the edges to their former crispy glory while warming the interior to a cozy temperature.
Best Reheating Technique
The key to reviving day-old muffins lies in gentle heat and a touch of steam. Wrap muffins in a damp paper towel and microwave for 15-20 seconds, just until warm — this creates a mini steam bath that restores moisture without making them soggy. For a more gourmet approach, split and toast under the broiler for 2-3 minutes, watching carefully so they don't burn, then serve with a pat of butter that melts into all the nooks and crannies. If you're feeling fancy, warm them in a 300°F oven for 5-7 minutes, which refreshes the texture and makes them taste almost as good as fresh-baked, perfect for impressing unexpected guests or treating yourself to a bakery-quality experience at home.