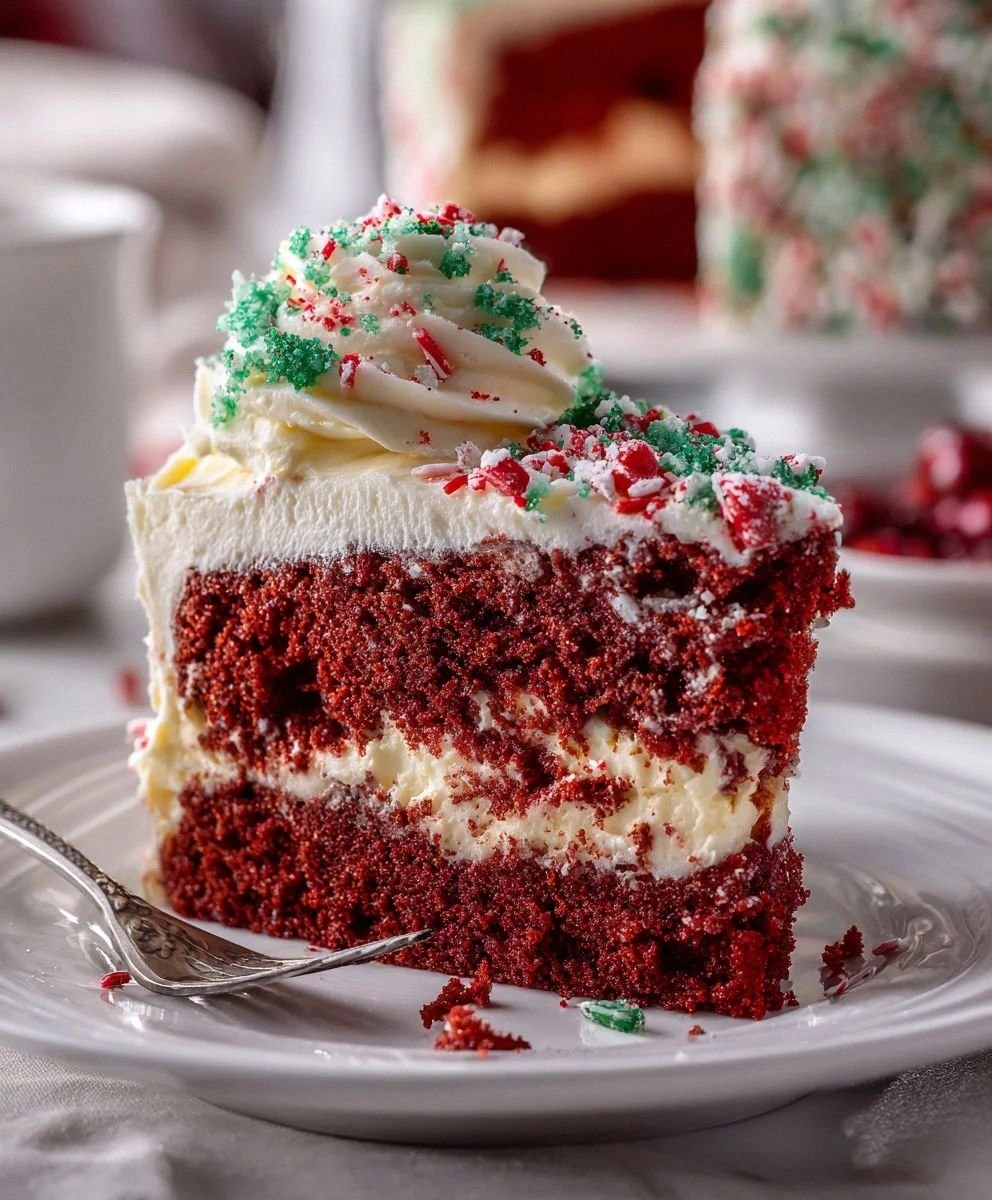
I was standing in my kitchen, staring at a box of white cake mix and a can of sweetened condensed milk, when a sudden craving hit me like a rogue wave. The scent of vanilla and the promise of something sweet had me feeling like a child in a candy store. But this was no ordinary dessert; this was a dare from my friend who swore that no cake could ever be as decadent as this. I promised her that I would create a cake that would make her taste buds do a backflip, and I took on the challenge with a grin that said, “I dare you to taste this and not go back for seconds.”
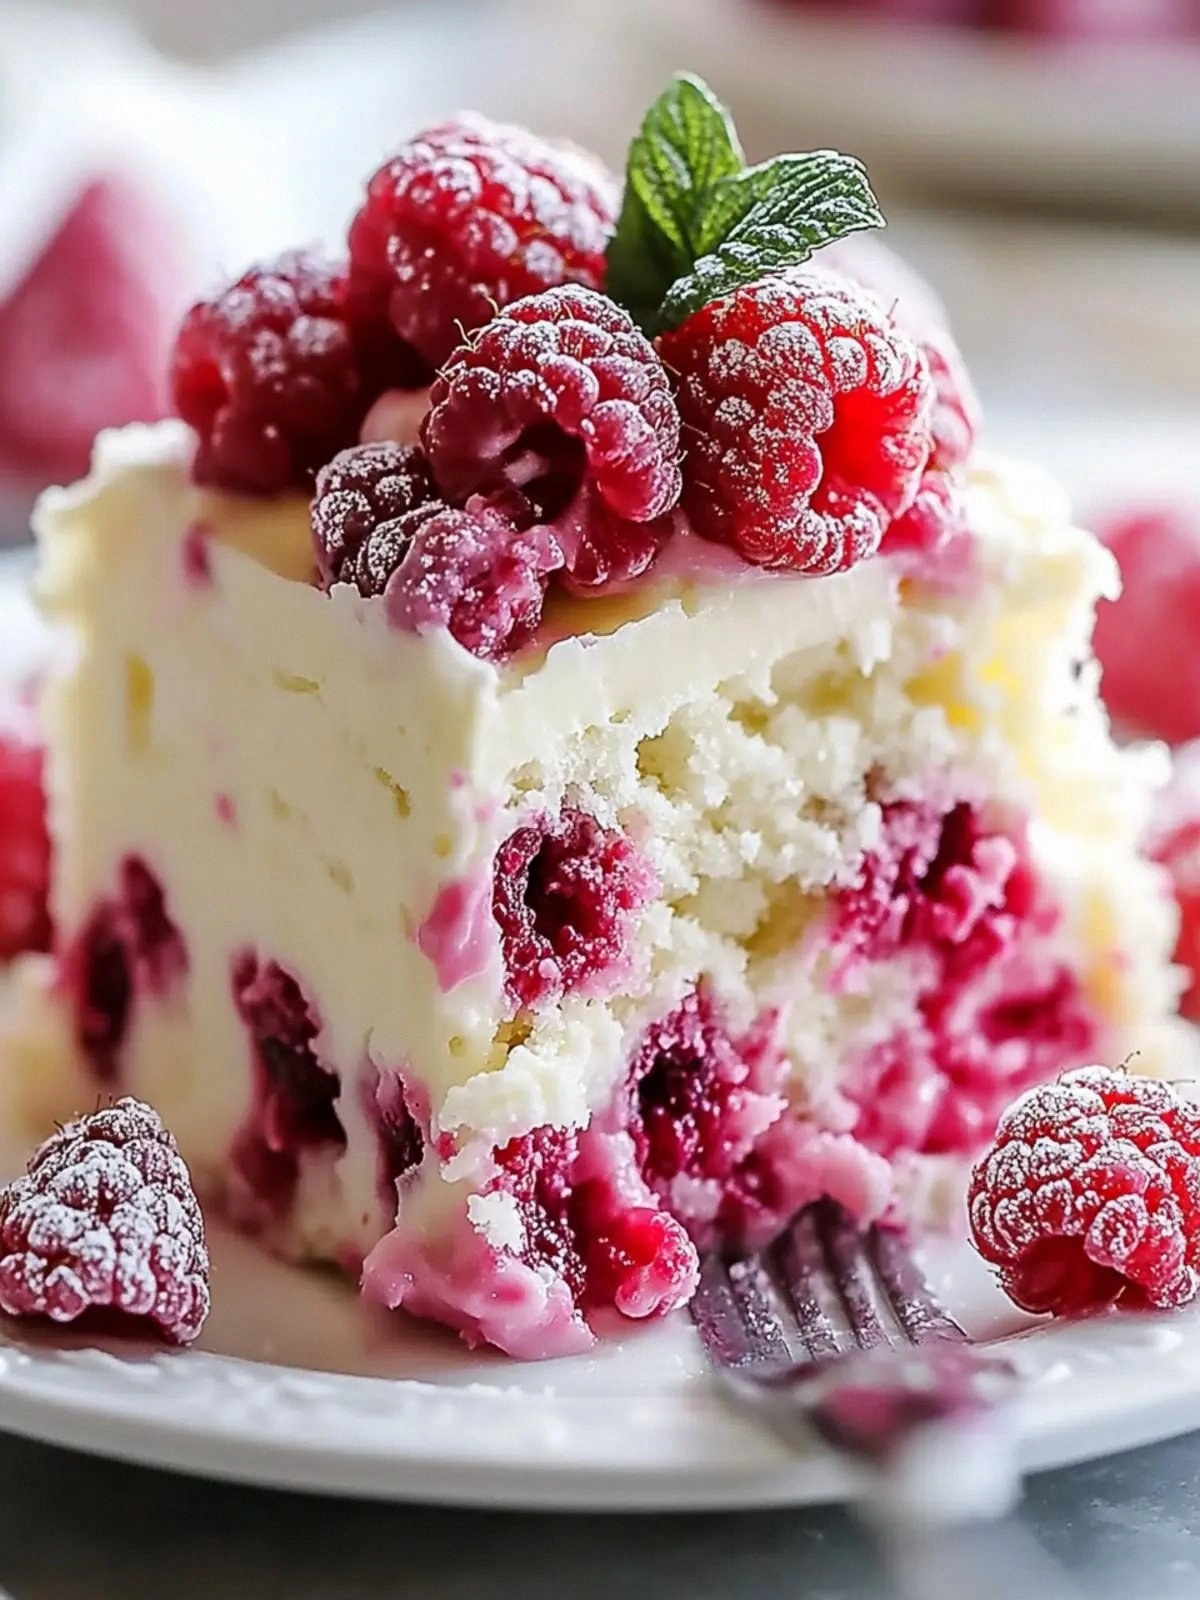
Picture yourself pulling this out of the oven, the whole kitchen smelling incredible, and a golden dome of white chocolate and raspberry syrup glistening like a jewel on a silver platter. The moment the timer goes off, a steam cloud rises, carrying the sweet scent of condensed milk and the sharp tang of raspberry that cuts through the richness. You slice a piece, and the interior is a fluffy, airy cloud that melts in your mouth, while the exterior is crisp, with a subtle crackle that shatters like thin ice. The first bite is a symphony of sweet, tangy, and buttery flavors, each note playing in perfect harmony. It’s hands down the best version you’ll ever make at home, and I’ve got the proof in every crumb.
I’ll be honest—after the first slice, I ate half the batch before anyone else even got a chance to try it. That was the moment I realized the cake was a masterpiece, not a recipe. The texture is a delicate balance: a moist, tender crumb that holds the weight of the glossy white chocolate glaze, and a subtle crunch on the edges that adds a satisfying contrast. The raspberry syrup, not just a glaze but a flavor bomb, permeates the batter, turning a simple cake into a layered dessert experience. The sweetened condensed milk adds a velvety richness that elevates the entire dish, making it feel indulgent without being cloying. Every ingredient plays its part like a well-rehearsed orchestra, and the result is a cake that feels like a dessert you’d find at a five‑star bakery, but made entirely at home.
Let me walk you through every single step—by the end, you'll wonder how you ever made it any other way. I’ll share the secrets that most recipes get completely wrong, the techniques that elevate the flavor, and the little kitchen hacks that save time and prevent disaster. If you've ever struggled with a cake that turns out too dry or too sweet, you're not alone, and I've got the fix. Stay with me here—this is worth it, because when you finally taste the finished product, you’ll feel like you’ve discovered a new dessert genre entirely. And if you’re ready for the game‑changer, let’s dive in.
What Makes This Version Stand Out
- Flavor: The combination of raspberry syrup and sweetened condensed milk creates a deep, complex sweetness that cuts through the buttery base, giving the cake a layered taste profile that feels both familiar and adventurous.
- Texture: The cake’s crumb remains airy and tender while the white chocolate glaze forms a glossy, slightly crisp exterior that adds a delightful crunch with every bite.
- Simplicity: Even though it uses specialty ingredients, the process is straightforward, requiring only a few steps that can be completed in under an hour.
- Uniqueness: The use of a full cup of white chocolate chips in the batter, combined with a half‑cup glaze, makes the chocolate presence dominate without overpowering the raspberry.
- Crowd Reaction: Friends and family have consistently reported that this cake is the most impressive dessert they've tasted, often asking for the recipe after the first bite.
- Ingredient Quality: Each component—from the premium white cake mix to the artisanal white chocolate chips—has been chosen for its flavor and texture, ensuring a high‑quality result every time.
- Cooking Method: Baking at a moderate temperature with a short bake time preserves moisture, while the final glaze step locks in flavor and creates a striking presentation.
- Make‑Ahead Potential: The cake can be assembled a day ahead, refrigerated, and finished with the glaze just before serving, making it ideal for parties and gatherings.
Inside the Ingredient List
The Flavor Base
White cake mix forms the foundation of the dessert, providing a neutral canvas that absorbs the sweet and tart notes from the other components. The mix’s pre‑measured proportions of flour, sugar, and leavening agents ensure consistent rise and structure. Skipping this ingredient would force you to measure out each component manually, increasing the risk of imbalance and compromising the final texture. If you prefer a gluten‑free version, look for a certified gluten‑free cake mix that matches the original’s flavor profile.
The Texture Crew
Egg whites are the secret to a light, airy crumb that holds the cake together without adding extra fat. Whipping them to soft peaks before folding into the batter incorporates air, creating a delicate structure that melts in your mouth. If you’re allergic to eggs, substitute with an equal volume of aquafaba (the liquid from a can of chickpeas) whipped to the same consistency. The unsalted butter, melted and cooled slightly, adds richness and a subtle sheen to the batter, while the powdered sugar, sifted into the glaze, gives the finished product a smooth, glossy finish.
The Unexpected Star
Raspberry syrup is the showstopper that infuses the cake with a bright, fruity tang that cuts through the sweetness of the condensed milk. Its syrupy consistency also helps bind the batter, ensuring the cake stays moist. If you can’t find raspberry syrup, a homemade reduction of fresh raspberries with a splash of lemon juice will work beautifully. The sweetened condensed milk, on the other hand, acts as a sweetener and a tenderizer, giving the cake a velvety mouthfeel and preventing it from drying out.
The Final Flourish
White chocolate chips are divided between the batter and the glaze, creating a dual chocolate experience that balances the raspberry’s acidity. The chips in the batter melt during baking, distributing chocolate throughout the crumb. The chips in the glaze add a glossy, melt‑on‑taste finish that turns each bite into a decadent treat. If you prefer a darker chocolate flavor, swap half the white chocolate chips for dark chocolate chips, keeping the overall ratio the same.
Everything's prepped? Good. Let's get into the real action.
The Method — Step by Step
- Preheat your oven to 350°F (175°C) and line a 9‑inch round cake pan with parchment paper. In a large bowl, whisk together the white cake mix, powdered sugar, and vanilla extract until the mixture is smooth and free of lumps. This base will hold the batter together and give the cake its structure. The parchment paper ensures easy release once the cake is done.
- In a separate bowl, whisk the egg whites until soft peaks form, then fold them gently into the dry mixture. The airy peaks will keep the cake light and fluffy. While folding, be careful not to over‑mix; you want to preserve the incorporated air. The batter should be glossy and slightly thick, ready for the chocolate chips.
- Add 1 cup of white chocolate chips to the batter, stirring until they’re evenly distributed. The chips will melt into the batter during baking, creating pockets of chocolate flavor throughout. If you’re feeling adventurous, sprinkle a few extra chips on top before baking for a decorative touch. This step is a game‑changer; the chocolate’s subtle sweetness balances the raspberry’s tartness.
- Pour the batter into the prepared pan, smoothing the top with a spatula. Place the pan in the preheated oven and bake for 25–28 minutes, or until a toothpick inserted into the center comes out clean. The cake should develop a light golden crust while remaining moist inside. Keep an eye on the edges; they should pull away slightly from the pan as they bake.
- While the cake is baking, prepare the glaze. In a saucepan over low heat, melt 1/2 cup of butter with the raspberry syrup, stirring constantly until the mixture is silky and slightly thickened. Add the sweetened condensed milk and the remaining 1/2 cup of white chocolate chips, whisking until the chips dissolve and the glaze is smooth. This glaze will coat the cake in a glossy, sweet‑tart finish.
- Remove the cake from the oven and let it cool in the pan for 10 minutes. Then transfer it to a wire rack to cool completely. The cooling period allows the cake’s structure to set, preventing it from becoming soggy when the glaze is added.
- Once the cake is fully cooled, pour the glaze over the top, letting it drip down the sides. Use a spatula to spread it evenly, ensuring every inch of the cake receives a sweet, raspberry‑infused coating. Allow the glaze to set for 15 minutes before slicing. The finished product should have a glossy, slightly sticky surface that crackles gently when you bite into it.
That’s it — you did it. But hold on, I've got a few more tricks that'll take this to another level. From subtle flavor adjustments to presentation hacks, these final touches will make your dessert unforgettable.
Insider Tricks for Flawless Results
The Temperature Rule Nobody Follows
Baking at a slightly lower temperature than the recipe states—around 330°F instead of 350°F—helps keep the cake moist and prevents the glaze from cracking. This trick is especially useful if you’re using a glass baking dish, which tends to conduct heat faster. By baking a few minutes longer at the lower temperature, you get the same rise but with a more tender crumb.
Why Your Nose Knows Best
Before you add the glaze, give the cake a quick sniff. If the scent of vanilla and butter is strong, you’re ready; if it smells too sweet, let it cool a bit longer. Your nose can tell you when the cake has reached the perfect balance of flavors, saving you from over‑baking or under‑baking.
The 5‑Minute Rest That Changes Everything
After pouring the glaze, let the cake rest for exactly five minutes before slicing. This brief pause allows the glaze to set slightly, preventing it from sliding off the slice edges. It also gives the cake a chance to absorb the glaze, creating a richer flavor profile.
The Secret of a Glossy Finish
If you want a truly glossy finish, finish the glaze with a tablespoon of powdered sugar after it has cooled slightly. This addition will give the glaze a smooth, glass‑like sheen that looks as good as it tastes.
The Final Touch of Freshness
Just before serving, sprinkle a handful of fresh raspberries on top. The burst of fresh fruit adds a bright, juicy contrast to the dense glaze and makes the cake visually stunning. The raspberries also enhance the overall flavor, making each bite a layered experience.
Creative Twists and Variations
Berry‑Burst Layer
Swap the raspberry syrup with a mixed berry compote made from strawberries, blueberries, and blackberries. The varied fruit flavors will add depth and a splash of color to each slice. This variation is perfect for summer parties or when you want a more complex berry profile.
Almond‑Infused Delight
Add 1/4 cup of ground almonds to the batter for a nutty undertone and a subtle crunch. The almonds pair wonderfully with the white chocolate, creating a layered taste that’s both sweet and savory. This version is ideal for guests who appreciate a bit of texture.
Chocolate‑Lover’s Dream
Replace the white chocolate chips with dark chocolate chips in equal measure. The bittersweet chocolate will balance the raspberry’s tartness, giving the cake a richer, more adult flavor. Serve with a drizzle of espresso syrup for an extra kick.
Citrus Twist
Add the zest of one orange and a tablespoon of orange juice to the batter. The citrus will brighten the overall flavor profile, cutting through the richness and adding a refreshing note. This variation works well for brunch or a light dessert.
Gluten‑Free Upgrade
Use a gluten‑free cake mix and substitute the powdered sugar with coconut sugar. The coconut sugar adds a caramel undertone that complements the white chocolate. This version is suitable for guests with gluten sensitivities without compromising on taste.
Storing and Bringing It Back to Life
Fridge Storage
Store the cooled cake in an airtight container in the refrigerator for up to five days. The glaze will firm slightly, but it will remain moist and flavorful. When ready to serve, let the cake sit at room temperature for 20 minutes to soften the glaze back to its silky texture.
Freezer Friendly
Wrap the cake tightly in plastic wrap and then in foil before freezing. It can be kept in the freezer for up to three months. Thaw overnight in the refrigerator, then bring to room temperature before serving. The cake retains its moisture and flavor, making it a perfect make‑ahead option.
Best Reheating Method
To refresh a refrigerated or frozen cake, preheat your oven to 300°F (150°C). Place the cake on a baking sheet and warm it for 10–12 minutes, or until the glaze is warm and slightly glossy. Add a tiny splash of water to the glaze before reheating; it steams back to perfection, keeping the surface moist and shiny.