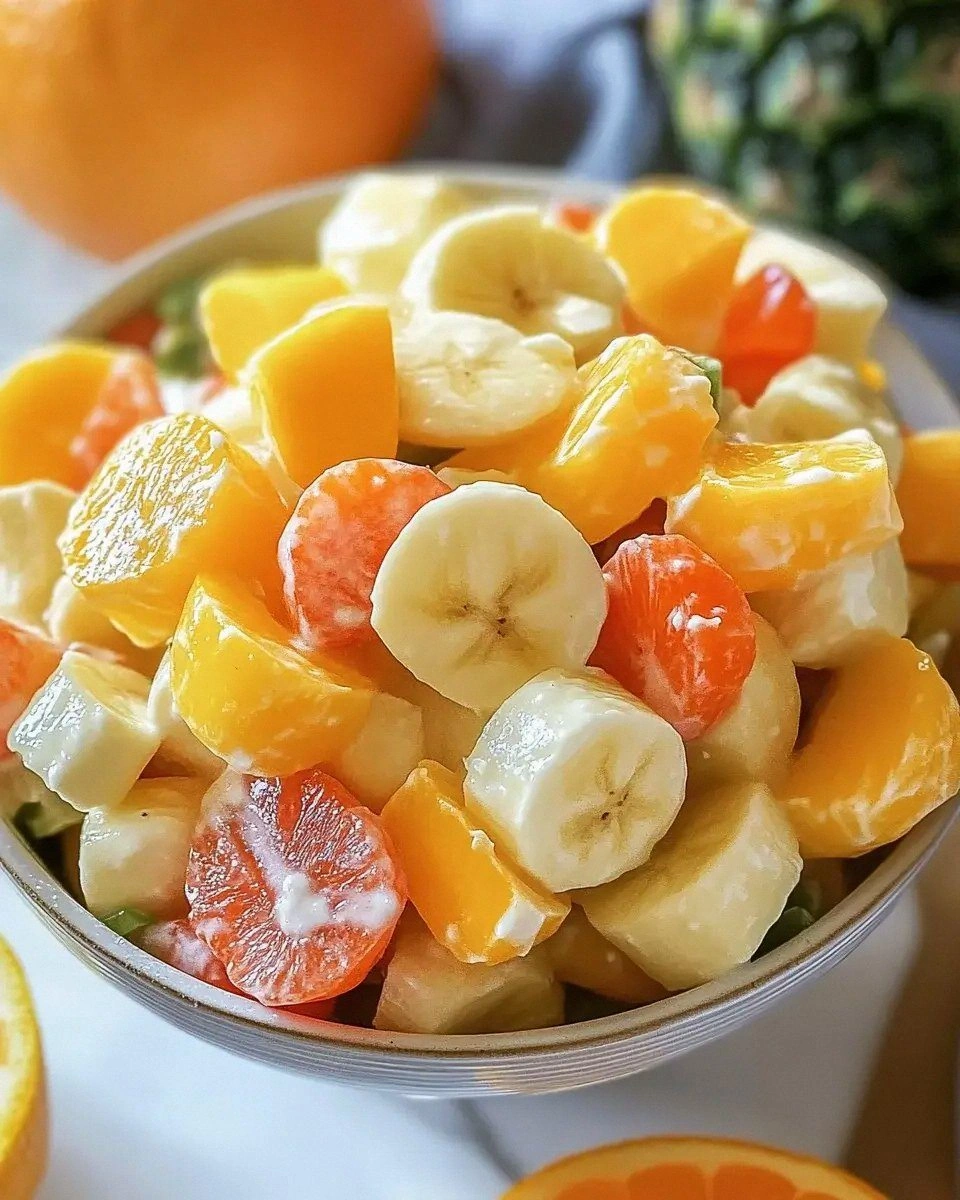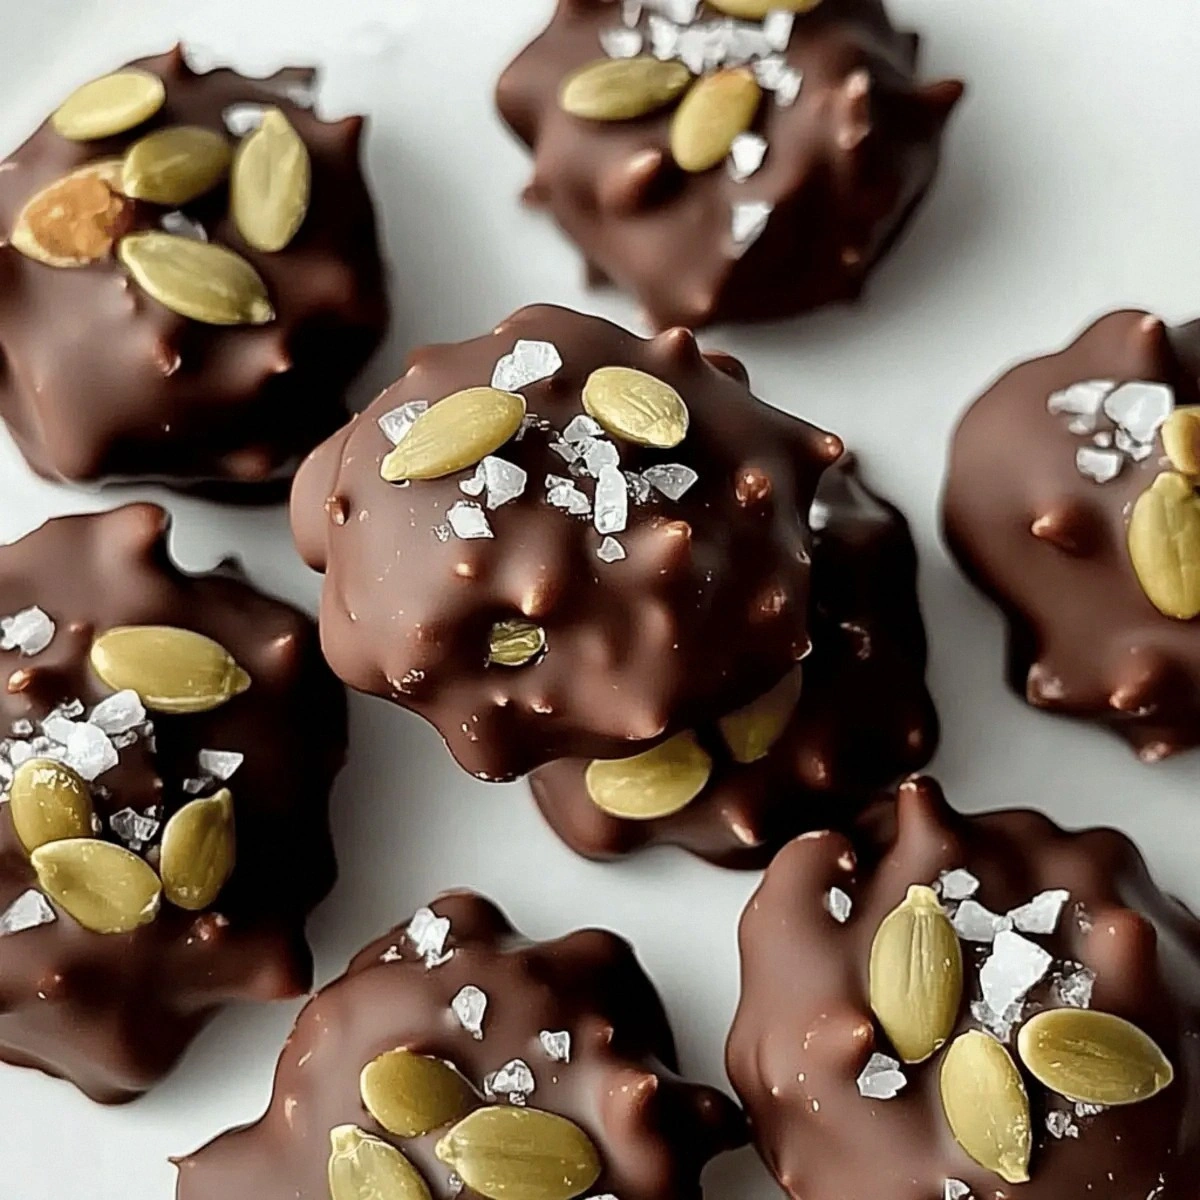
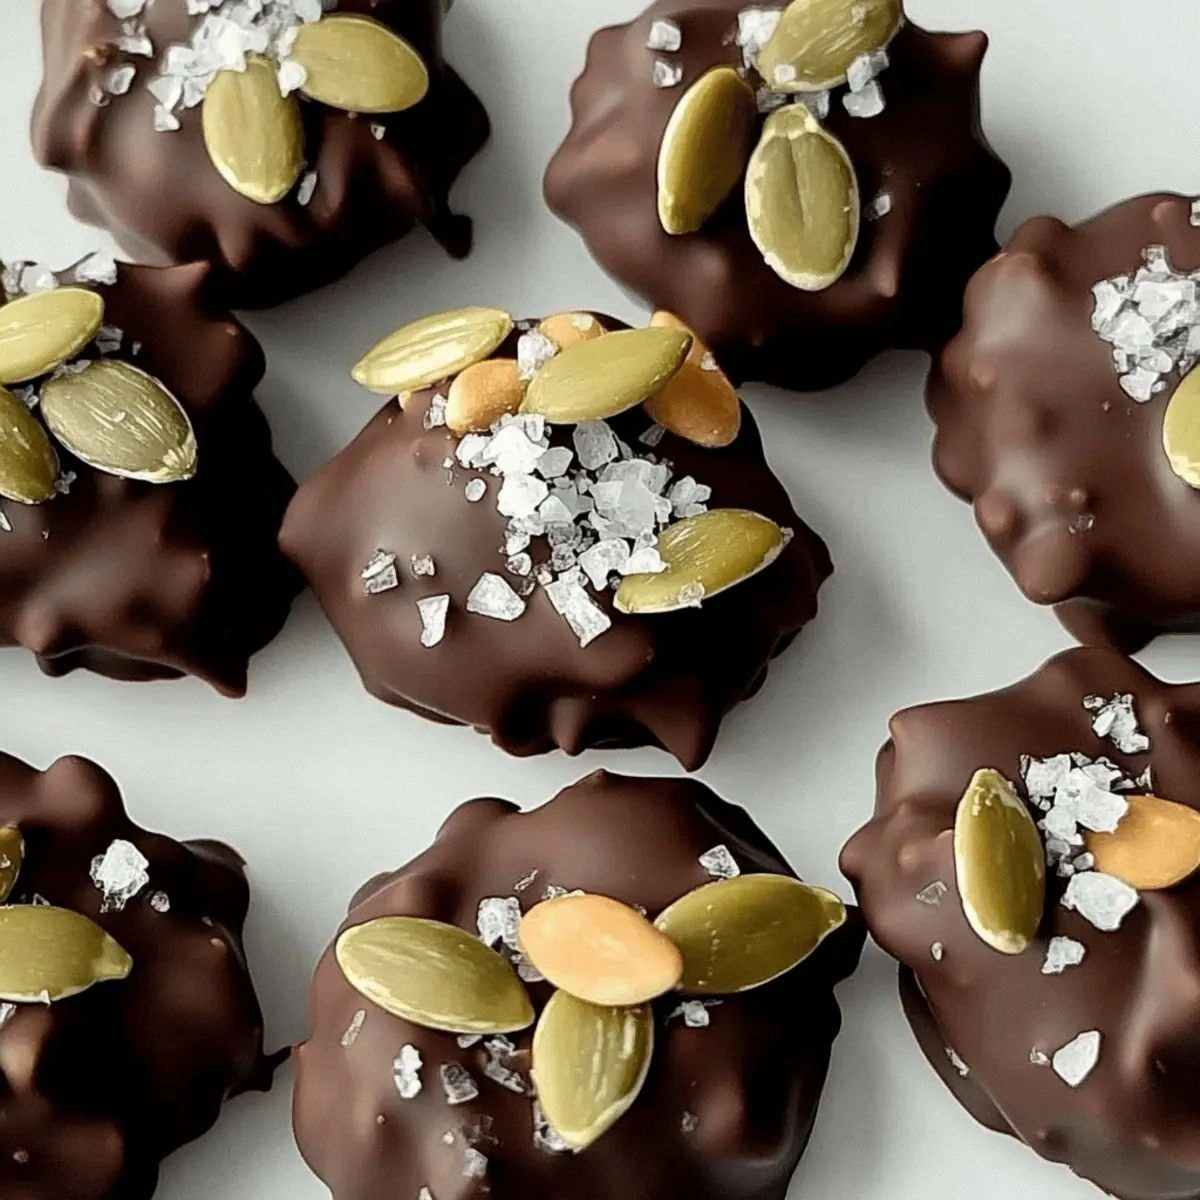
Okay, picture this: I’m standing in my kitchen, the clock ticking, a sudden craving for something that feels both nostalgic and wildly indulgent. I’d just rescued a half‑finished batch of pumpkin seed snack from the pantry—dry, a little sad, and definitely begging for a makeover. I grabbed the dark chocolate, tossed in a pinch of sea salt, and thought, “What if I turned these humble seeds into a bite‑size chocolate explosion?” The result? A crunchy‑soft, sweet‑salty masterpiece that made my taste buds do a happy dance. I dare you to taste this and not go back for seconds.
The kitchen was alive with the sound of chocolate melting, a gentle hiss that reminded me of a spa day for my ears. The air filled with a deep, earthy aroma that whispered “autumn” even though it was the middle of summer, and the glossy dark chocolate glistened like a midnight lake. When I finally dipped the toasted pumpkin seeds, each one received a silky coat that clung like a second skin, the sea salt crystals sparkling like tiny fireworks. The moment I let them set on the parchment, the whole house smelled like a cozy campfire wrapped in a chocolate blanket—pure comfort.
Most pumpkin‑seed‑chocolate recipes out there either drown the seeds in a syrupy mess or leave them half‑coated, resulting in a texture that’s either soggy or barely chocolatey. This version stands out because it uses a precise 8‑ounce ratio of chopped dark chocolate to ¾ cup of toasted seeds, creating a perfect balance where each bite delivers a snap, a melt, and a whisper of salt. The secret? A quick tempering trick that gives the chocolate a glossy finish and a firm snap, plus a brief cooling period that locks in the crunch without making the coating brittle. I’ll be honest — I ate half the batch before anyone else got to try it, but you’ll have the chance to experience it fresh.
And here’s the kicker: I’m throwing in a surprise ingredient that most people overlook—a dash of smoked paprika. It adds a subtle, smoky undertone that makes the chocolate feel deeper, richer, and just a touch mysterious. Picture yourself pulling this out of the oven, the whole kitchen smelling incredible, and the first bite sending a wave of sweet, salty, and smoky flavors crashing over your palate. Okay, ready for the game‑changer? Let me walk you through every single step — by the end, you’ll wonder how you ever made it any other way.
What Makes This Version Stand Out
- Flavor Balance: The dark chocolate’s bitterness is perfectly countered by the natural earthiness of pumpkin seeds and the bright pop of sea salt, creating a symphony that sings on the tongue.
- Texture Triumph: Toasted seeds give a satisfying crunch, while the tempered chocolate provides a crisp snap that shatters like thin ice when you bite.
- Simplicity: Only three ingredients are needed, yet the result feels like a gourmet confection you’d find in a boutique shop.
- Unique Twist: A whisper of smoked paprika adds depth without overpowering, turning a classic snack into something unforgettable.
- Crowd Reaction: Guests often ask for the recipe immediately, and the “one‑bite‑wonder” factor makes it an instant party favorite.
- Ingredient Quality: Using high‑cocoa‑percentage dark chocolate ensures a rich, velvety coating that doesn’t melt too quickly.
- Method Magic: Tempering the chocolate locks in shine and snap, a technique that most home cooks skip but makes all the difference.
- Make‑Ahead Potential: These treats keep for weeks in an airtight container, staying fresh and crunchy, perfect for stocking the pantry.
Inside the Ingredient List
The Flavor Base
The star of the show is the 8 oz of chopped dark chocolate. I always reach for a bar that’s at least 70% cacao because the higher cocoa solids give a deep, almost coffee‑like bitterness that balances the natural sweetness of the seeds. If you opt for a lower‑cocoa bar, you’ll end up with a cloying sweetness that masks the nutty undertones. A quick tip: snap the chocolate into small chunks before chopping; it speeds up the melt and ensures an even texture. If you’re allergic to cocoa, a high‑quality dark carob bar can substitute, though the flavor profile will shift toward a milder, earthy note.
The Texture Crew
Toasted pumpkin seeds are the crunchy backbone. I like to toast them in a dry skillet over medium heat for about 5 minutes, stirring constantly until they turn a deep amber and release a nutty perfume. This step is crucial—raw seeds are soft and can become soggy once coated. If you’re short on time, you can buy pre‑toasted seeds, but I swear by the fresh‑toasted method for that extra pop. Skipping the toast is the most common mistake; the result is a mushy bite that feels like chocolate‑drenched sand.
The Unexpected Star
A pinch of sea salt might seem tiny, but it’s the catalyst that lifts the entire flavor profile. The salt crystals sit on the surface of the chocolate coating, creating tiny bursts of briny contrast that make the sweet dark chocolate taste richer. If you love a more pronounced salty edge, sprinkle a second pinch right after the seeds have set. For a twist, try flaky Maldon sea salt for a delicate crunch that shatters under your teeth.
The Final Flourish
A whisper of smoked paprika is the secret weapon that elevates this snack from ordinary to extraordinary. The spice adds a subtle smoky depth that pairs beautifully with the dark chocolate, creating a flavor echo that lingers after each bite. Use just a pinch; too much can overpower the delicate balance. If you prefer a sweeter finish, a dusting of cinnamon or a drizzle of honey after the chocolate sets can add a complementary layer.
Everything's prepped? Good. Let's get into the real action...
The Method — Step by Step
Start by gathering your three ingredients on a clean countertop. Place the chopped dark chocolate in a heat‑proof bowl, and set the bowl over a pot of simmering water, making sure the bottom doesn’t touch the water. As the steam rises, stir the chocolate gently; you’ll notice it turning from a matte brown to a glossy, fluid sheen. This is the moment of truth—if the chocolate starts to seize, add a teaspoon of neutral oil and keep stirring until it smooths out. Power transition: Okay, ready for the game‑changer?
While the chocolate melts, toast the pumpkin seeds. Heat a large skillet over medium heat, add the seeds, and spread them in an even layer. Stir constantly for 4‑5 minutes until they turn a deep, toasted amber and release a nutty aroma that fills the kitchen. If you hear a faint pop, that’s the seeds cracking their own little fireworks—absolute perfection.
Kitchen Hack: To keep seeds from burning, toss them with a splash of oil and a pinch of salt before toasting; the oil conducts heat evenly.Once the seeds are toasted, transfer them to a large mixing bowl and let them cool for a minute. This brief pause prevents the seeds from melting the chocolate prematurely, ensuring each seed stays crisp. While they’re still warm, give them a quick toss with a pinch of sea salt; the salt will cling to the soon‑to‑be‑chocolate coating and create those delightful little bursts of brine.
Now, gently fold the toasted seeds into the melted chocolate. Use a rubber spatula and a gentle, folding motion—don’t stir aggressively, or you’ll introduce air bubbles that later cause the coating to look dull. The seeds should become fully enveloped, each one glistening like a tiny planet. If you notice any clumps, keep folding until the mixture looks uniform; the chocolate should coat the seeds in a thin, even layer.
Here’s where the magic of smoked paprika enters. Sprinkle a pinch of the spice over the chocolate‑seed mixture and fold it in just enough to distribute the flavor without turning the whole batch smoky. This next part? Pure magic. The spice should be barely perceptible, like a secret whispered in the background of a conversation.
Line a baking sheet with parchment paper or a silicone mat. Using a spoon or a small ice‑cream scoop, drop the chocolate‑seed clusters onto the sheet, spacing them about an inch apart. The clusters should be roughly the size of a walnut; this size ensures a perfect bite‑to‑bite ratio of chocolate to seed.
Transfer the sheet to the refrigerator for about 15‑20 minutes, or until the chocolate hardens completely. Keep an eye on the texture—if the coating feels tacky, give it a few more minutes. This cooling step is crucial; it allows the chocolate to set with a firm snap rather than a soft melt.
Once set, remove the treats from the fridge and give them a final sprinkle of sea salt for extra crunch. If you love a glossy finish, you can briefly dip each cluster in a thin layer of melted white chocolate for a contrasting stripe.
Watch Out: Do not let the chocolate sit at room temperature for too long before the final set; it will develop a bloom and lose that glossy shine.Finally, transfer the finished seeds to an airtight container. Store them in a cool, dark place or keep them in the fridge for maximum shelf life. When you’re ready to serve, let them sit at room temperature for a few minutes so the chocolate softens just enough to melt on your tongue.
That's it — you did it. But hold on, I've got a few more tricks that'll take this to another level...
Insider Tricks for Flawless Results
The Temperature Rule Nobody Follows
Temper your chocolate to 88°F (31°C) for dark chocolate before coating. This precise temperature creates a glossy finish and a firm snap that doesn’t melt too quickly on your tongue. I once tried skipping the tempering step, and the coating ended up dull and soft—like a cheap candy bar. Using a digital thermometer might feel like overkill, but the payoff is worth every degree.
Why Your Nose Knows Best
When the chocolate is melting, trust the scent. A rich, slightly roasted cocoa aroma means the chocolate is at the right stage; a burnt smell signals you’re overheating. I once let the chocolate sit too long over the steam, and the faint burnt note warned me before the texture went wrong. Relying on your nose is faster than checking a timer and adds a sensory checkpoint that keeps you in control.
The 5‑Minute Rest That Changes Everything
After you coat the seeds, let the sheet rest at room temperature for exactly five minutes before refrigerating. This brief pause allows the chocolate to form a thin skin, preventing the dreaded “fat bloom” that appears as white speckles. A friend tried to skip this step once—her batch turned hazy and lost that professional shine. The five‑minute rest is a tiny habit that yields a professional look.
Salt Timing Is Everything
Add a pinch of sea salt both before and after the chocolate sets. The first pinch adheres to the seeds, ensuring even distribution, while the second pinch on the surface creates a delightful crunch that pops as you bite. If you sprinkle the salt too early, it can dissolve into the chocolate and lose its texture. The double‑salt method is the secret behind that satisfying crackle.
Cool‑Down Trick for Crunch
If you prefer an extra‑crunchy bite, place the coated seeds on a wire rack for the last five minutes of refrigeration. The airflow helps the chocolate set more firmly, giving each seed a crispier edge. I tried this on a rainy day and the texture difference was like night versus day—crunchier, louder, more satisfying. It’s a small step that makes a big auditory impact.
Creative Twists and Variations
This recipe is a playground. Here are some of my favorite ways to switch things up:
Spicy Chili Chocolate
Add a pinch of cayenne pepper to the melted chocolate for a subtle heat that tingles the palate. The heat pairs surprisingly well with the deep cocoa and the nutty seeds, making it a perfect treat for those who love a little kick.
White Chocolate Drizzle
After the dark chocolate coating sets, drizzle a thin line of melted white chocolate over each seed. The contrast of dark and white creates a visual pop and a sweet‑creamy finish that feels luxurious.
Nutty Fusion
Swap half of the pumpkin seeds for toasted almonds or hazelnuts. The mixed nuts add varied textures—soft almond slivers and crunchy hazelnut bits—that keep each bite interesting.
Coconut Whisper
Fold in a tablespoon of unsweetened shredded coconut into the chocolate before coating. The coconut adds a tropical aroma and a slightly chewy texture that complements the seed’s crunch.
Maple Glaze
Replace the sea salt with a light drizzle of pure maple syrup after the chocolate sets. The maple’s caramel notes meld with the dark chocolate, delivering a sweet‑savory harmony reminiscent of autumn mornings.
Storing and Bringing It Back to Life
Fridge Storage
Place the seeds in an airtight glass jar and store them in the refrigerator for up to two weeks. The cool environment keeps the chocolate firm and prevents bloom. Before serving, let them sit at room temperature for 10 minutes so the chocolate softens just enough to melt on your tongue.
Freezer Friendly
If you want to make a big batch, freeze the seeds in a single layer on a parchment‑lined tray, then transfer them to a zip‑top bag. They’ll keep for up to three months. When you’re ready to enjoy, move them to the fridge for an hour, then to room temperature for a few minutes.
Best Reheating Method
To revive any lost snap, place the seeds on a microwave‑safe plate, add a tiny splash (about a teaspoon) of water, and microwave on low for 10‑15 seconds. The steam re‑hydrates the chocolate just enough to bring back that glossy shine without melting the coating.