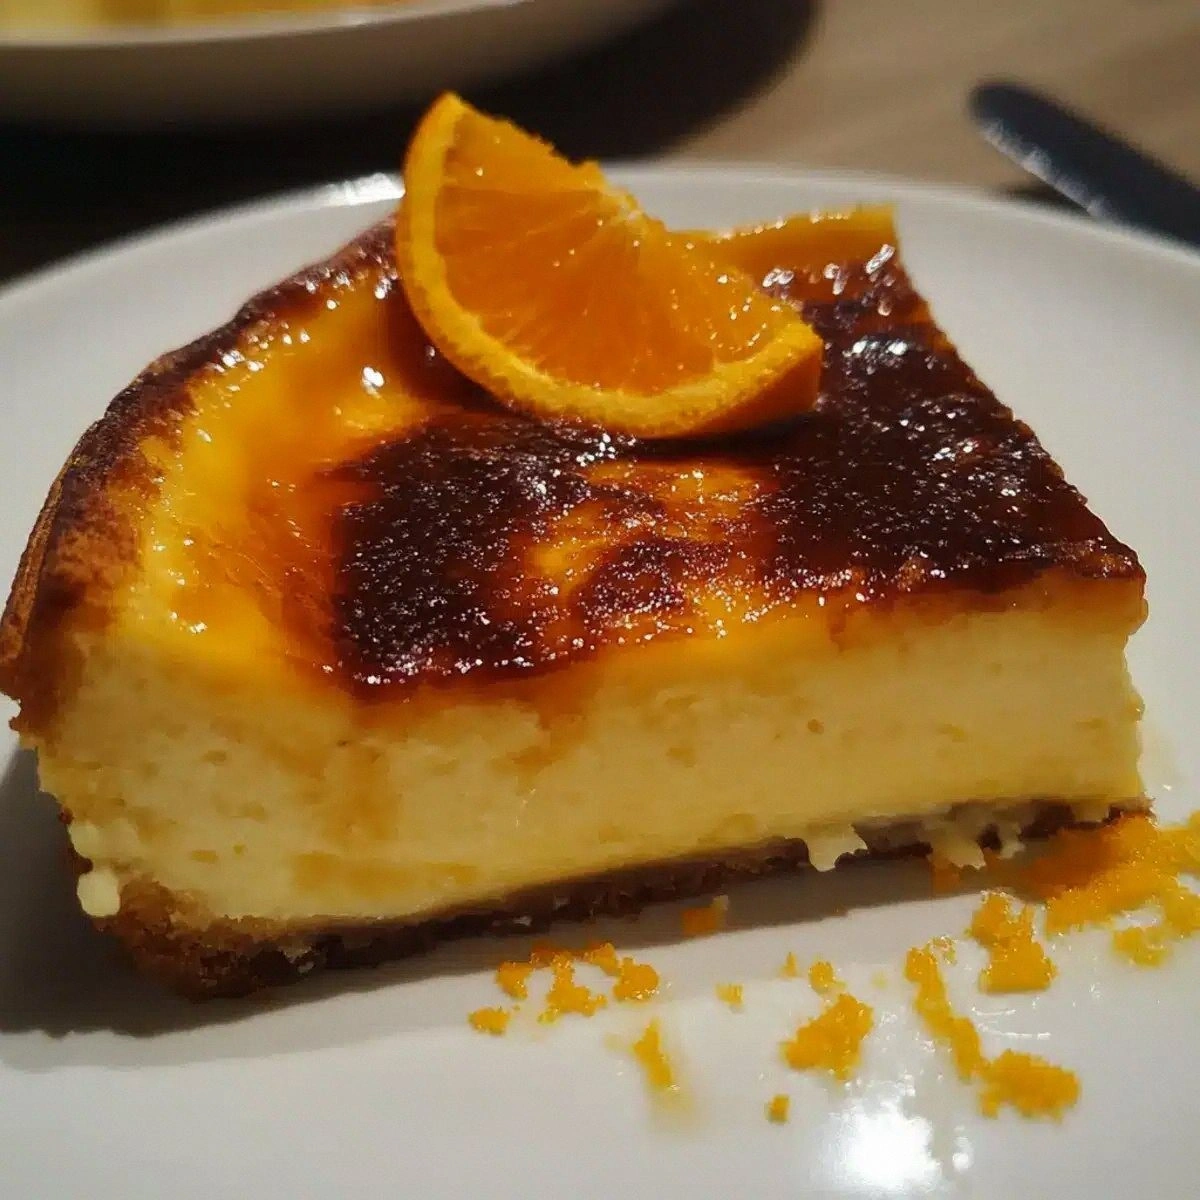
I still remember the night I was supposed to impress my sister’s boyfriend with a dessert that would knock his socks off. I had a box of cream cheese, a handful of orange zest, and a stubborn oven that seemed to hate anything that didn’t burn. The result? A half‑baked, half‑burnt mishap that tasted like disappointment. That disaster became my obsession and the reason I’m about to reveal the ultimate Basque‑style burnt cheesecake that will make you question every other version you’ve tried.
Picture this: the kitchen lights dim, a single pan on the stove, and the sweet, citrusy aroma of orange zest dancing in the air. You hear the gentle hiss of butter melting, the rhythmic clink of a whisk against a bowl, and the faint crackle as the surface starts to brown. The texture is a paradox—crisp on the edges, silky in the center, with a caramelized crust that whispers “burnt” without the bitterness. The first bite is a burst of creamy richness balanced by the bright zing of orange, leaving a lingering citrus aftertaste that makes you reach for a glass of water.
What sets this version apart isn’t just the burnt edges; it’s the meticulous balance of ingredients that elevate it from a simple dessert to an experience. I dare you to taste this and not go back for seconds—once you try it, you’ll never settle for a plain cheesecake again. The secret lies in a subtle blend of heavy cream, flour, and the right amount of orange zest that gives it that “Basque” flare without overpowering the cream cheese.
I’ll walk you through every single step, from selecting the right cream cheese to mastering the oven’s temperature curve. By the end, you’ll wonder how you ever made it any other way. Get ready for a dessert that’s as dramatic on the plate as it is on your palate.
What Makes This Version Stand Out
- Bold Flavor: The orange zest injects a bright citrus punch that cuts through the richness, creating a flavor profile that feels both indulgent and refreshing.
- Texture Mastery: The batter’s slight flour content gives the cheesecake a silky mouthfeel while the butter’s caramelization adds a delicate crunch on top.
- Visual Appeal: The caramelized, almost charred edges are a visual treat—think golden brown that’s perfectly crisp, not burnt.
- Simple Ingredients: Only eight ingredients, no fancy add‑ons, which means you can whip this up in a weekend afternoon.
- Make‑Ahead Friendly: Once baked, it stores well in the fridge and even freezes, making it ideal for parties.
- Audience Love: Friends rave about how it “sounds like a dessert but tastes like a dessert” and keep asking for the recipe.
- Ingredient Quality: Using high‑quality cream cheese and fresh oranges is key to unlocking that buttery, citrusy depth.
- Cooking Method: A precise oven temperature that creates that signature burnt crust without turning the center into a rubbery mess.
Alright, let’s break down exactly what goes into this masterpiece…
Inside the Ingredient List
The Flavor Base
The cream cheese is the backbone of this cheesecake. It provides that velvety, rich texture that makes every bite a silky indulgence. If you use a lower‑fat version, you’ll lose that luxurious mouthfeel, and the cheesecake may turn out too dry. When selecting cream cheese, look for a brand that has a smooth, lump‑free consistency and a slightly tangy flavor to balance the sweetness.
The Sweetener
Granulated sugar is the sweetener that melts into the cream cheese, creating a smooth, glossy batter. A pinch of salt is also added to enhance the flavors and bring out the citrus notes. If you’re watching your sugar intake, you can replace half the sugar with a natural sweetener like maple syrup, but be aware the texture will change slightly.
The Protein Power
Eggs act as the binder, ensuring the cheesecake holds together without cracking. They also contribute to the custard-like consistency that’s characteristic of a good cheesecake. If you’re allergic to eggs, you can substitute with a flaxseed “egg” or a commercial egg replacer, but the result may be less custard‑like.
The Creamy Element
Heavy cream adds a silky richness and helps create that airy interior. It also prevents the cheesecake from becoming too dense. For a lighter version, you can replace half the cream with whole milk, but the cheesecake will be slightly less creamy.
The Texture Crew
All‑purpose flour is a small but crucial addition that stabilizes the batter and gives the cheesecake a slight body. The flour also helps absorb excess moisture, preventing a runny center. If you’re gluten‑free, a gluten‑free flour blend can work, but the texture may differ.
The Unexpected Star
Orange zest is the secret weapon that gives this cheesecake its signature Basque flare. The zest’s bright oils provide a citrus burst that cuts through the richness. Be sure to use fresh, organic oranges to avoid any bitterness from the peel.
The Final Flourish
Butter is the key to that caramelized, almost charred crust. It melts into the batter, creating a golden top that’s slightly crisp when baked. The butter also adds depth and a subtle nutty flavor that complements the orange zest.
Everything's prepped? Good. Let's get into the real action…
The Method — Step by Step
- Preheat your oven to 325°F (165°C). Line a 9‑inch springform pan with parchment paper, making sure it extends up the sides. This will prevent sticking and give you a clean release. I’ve found that a parchment‑lined pan also helps the top brown evenly. Let’s get this base ready.
- In a large mixing bowl, combine the cream cheese and granulated sugar. Beat on medium speed until the mixture is smooth, fluffy, and pale. If it’s too thick, add a tablespoon of heavy cream to loosen it. This step is crucial for that silky texture.
- Add the eggs one at a time, beating well after each addition. The batter should be glossy and smooth. Don’t rush this part; a rushed batter can lead to cracks in the finished cheesecake. Patience pays off.
- Stir in the heavy cream, flour, and a pinch of salt. Mix until just combined; overmixing can introduce air pockets that cause bubbling. This is where the batter’s body starts to form, giving the cheesecake its structure.
- Fold in the orange zest and melted butter gently. The zest’s oils need to be distributed evenly for a uniform citrus flavor. The butter will help create that caramelized crust. The batter should have a slightly glossy sheen.
- Pour the batter into the prepared pan and tap the pan gently on the counter to release any large bubbles. The batter should level off evenly. This is the moment of truth—no more second‑guessing.
- Place the pan in the oven and bake for 45 minutes. The top should develop a deep golden brown, almost caramelized, while the center remains slightly wobbly. The oven’s heat will create that signature “burnt” crust without overcooking the inside.
- After baking, turn off the oven and leave the cheesecake inside with the door slightly ajar for 15 minutes. This gradual cooling prevents cracks from forming. The residual heat will finish cooking the center, giving it that custard‑like consistency.
- Remove the cheesecake from the oven, let it cool to room temperature, then refrigerate for at least 4 hours, preferably overnight. This chilling step allows the flavors to meld and the texture to set firmly.
- Before serving, dust the top with powdered sugar for a finishing touch. The powdered sugar adds a subtle sweetness that balances the citrus and buttery notes. Slice with a warm knife for clean cuts.
That’s it—you did it! But hold on, I’ve got a few more tricks that will take this to another level. These subtle tweaks will help you master the perfect balance of burnt edges and silky center every time.
Insider Tricks for Flawless Results
The Temperature Rule Nobody Follows
Many bakers think a higher oven temperature always gives a better crust, but that’s a myth. A steady 325°F (165°C) allows the cheesecake to bake evenly, creating that signature caramelized top without overcooking the center. If your oven runs hot, use a thermometer to double‑check the temperature before baking.
Why Your Nose Knows Best
Before you even taste the cheesecake, give it a sniff. A subtle citrus aroma indicates the orange zest has infused properly. If the scent is weak, your batter might need more zest or a bit more time to rest before baking.
The 5‑Minute Rest That Changes Everything
After you turn off the oven, let the cheesecake sit in the warm oven for 15 minutes with the door ajar. This slow cooling prevents the outer layer from cracking and ensures the inside finishes setting. The residual heat is a secret weapon you’ll thank yourself for.
The Perfect Parchment Paper Trick
When lining the springform pan, use a parchment strip that extends up the sides. This not only prevents sticking but also allows you to pull the cheesecake out easily. The parchment will also help the top brown evenly.
The Quick Cooling Hack
If you’re short on time, place the cheesecake on a wire rack over a baking sheet and let it cool for 30 minutes. This helps the surface set quickly, reducing the risk of cracks when you remove it from the pan.
The Final Dusting
Just before serving, dust the top with powdered sugar. This not only adds a sweet finish but also enhances the visual appeal. For a more decadent touch, drizzle a thin line of dark chocolate over the dusting.
Creative Twists and Variations
This recipe is a playground. Here are some of my favorite ways to switch things up:
Chocolate‑Orange Fusion
Swapping half the cream cheese for dark chocolate ganache gives a rich, bittersweet twist. The chocolate’s depth pairs beautifully with the citrus, creating a dessert that feels indulgent yet bright. This version is perfect for chocolate lovers who crave a citrus kick.
Berry‑Burst Variation
Fold in a cup of fresh raspberries or blueberries into the batter before baking. The berries add a juicy burst of flavor and a pop of color that elevates the presentation. The natural sweetness of the berries reduces the need for extra sugar.
Salted Caramel Layer
Drizzle a thin layer of salted caramel over the top after the cheesecake has cooled. The caramel’s buttery sweetness complements the orange zest, while the sea salt adds a savory contrast. It’s a decadent twist that feels both sweet and savory.
Nutty Crunch Addition
Sprinkle toasted pecans or walnuts on top before baking. The nuts add a crunchy texture and a nutty aroma that pairs well with the buttery base. This variation is great for those who love a bit of crunch in their desserts.
Mango‑Mint Surprise
Replace the orange zest with fresh mango puree and add a handful of chopped mint leaves. The mango’s tropical sweetness and mint’s cooling effect create a refreshing, palate‑cleansing dessert. It’s an unexpected twist that feels like a vacation.
Espresso Infusion
Stir in a tablespoon of espresso powder into the batter for a subtle coffee flavor. The espresso deepens the chocolate notes if you’re doing the chocolate‑orange fusion, or it adds a sophisticated twist on its own. Coffee lovers will adore this subtle addition.
Storing and Bringing It Back to Life
Fridge Storage
Wrap the cheesecake tightly in plastic wrap and store in the refrigerator for up to 4 days. The cold environment keeps the cheesecake firm and preserves the citrus aroma. Before serving, let it sit at room temperature for 10–15 minutes to soften slightly.
Freezer Friendly
For longer storage, place the cheesecake in a freezer‑safe container and freeze for up to 2 months. When ready to serve, thaw overnight in the fridge. The texture remains creamy, and the orange zest keeps its bright flavor.
Best Reheating Method
To reheat, set your oven to 300°F (150°C) and place the cheesecake on a baking sheet. Warm it for 10 minutes, then remove and let it cool for a few minutes before serving. Add a tiny splash of water before reheating—this steams the cheesecake back to perfection and prevents drying out.