Imagine this moment: a sunny kitchen, a frantic timer, and a vanilla cake that collapsed into a soggy, unrecognizable mess. I stared at the ruined batter, feeling a mix of disappointment and curiosity that could only be satisfied by a daring experiment. That evening, I dared myself to turn the disaster into a dessert that would make my friends question their own baking instincts. The idea of a strawberry shortcake pudding was born from a simple craving for something sweet, airy, and utterly irresistible. I was determined to create a version that would stand out, a recipe that would become the talk of every gathering.
The scene was vivid: the scent of fresh strawberries mingled with the buttery aroma of toasted vanilla wafers, creating a heady perfume that made the entire house feel like a summer garden. My ears caught the gentle sizzle of cream as it heated, the soft rustle of parchment paper, and the distant hum of a radio playing a mellow tune. When I tasted the first bite, the sweetness exploded, the creamy pudding hugged the strawberries like velvet, and the wafers provided a satisfying crunch that echoed a sunrise. The texture was a dance of smoothness and bite, a harmony that could only be described as “sweet symphony.” My fingertips tingled with the coolness of the chilled pudding, a contrast that made the dish feel both refreshing and indulgent.
This version is a game changer because it combines the classic shortcake structure with a luscious instant pudding base that melts into silky cream. Unlike most recipes that rely on heavy whipped cream or a stiff mousse, this pudding layer introduces a subtle sweetness that coats the strawberries without overpowering them. The vanilla instant pudding mix provides a consistent, velvety texture that holds the strawberries in place, creating a dessert that is both stable and decadently airy. The addition of sweetened condensed milk gives a depth of flavor that feels like a warm hug in every spoonful. This combination of textures and flavors creates a dessert that feels both nostalgic and brand new.
What sets this recipe apart is the unexpected use of vanilla wafers as both a structural base and a crunchy topping. Instead of a traditional biscuit, the wafers are layered at the bottom, absorbing the pudding’s moisture while still retaining their crispness. The result is a dessert that feels like a layered cake, a mousse, and a fruit tart all at once. The technique of folding the strawberries into the pudding before setting them in the wafers ensures each bite is bursting with fresh fruit. It’s a method that most shortcake recipes overlook, but it’s what makes this version stand out from the rest.
I dare you to taste this and not go back for seconds; that’s the promise I make. This is hands down the best version you'll ever make at home, with a flavor profile that will have your guests begging for the recipe. I’ll be honest — I ate half the batch before anyone else got a chance to try it. Most recipes get this completely wrong; here's what actually works. Picture yourself pulling this out of the oven, the whole kitchen smelling incredible, and watching the layers settle into a perfect, creamy mosaic.
Let me walk you through every single step — by the end, you'll wonder how you ever made it any other way. The next section will reveal why this recipe is a culinary masterpiece, and then we’ll dive into the ingredients that make it shine. Stay with me, because the flavors are about to get real, and the texture is about to become your new obsession. Ready? Let’s begin the adventure.
What Makes This Version Stand Out
- Flavor: The blend of sweetened condensed milk and vanilla pudding creates a rich, caramel-like base that elevates every bite.
- Texture: The pudding layer delivers a silky mouthfeel that balances the crunchy vanilla wafers and juicy strawberries.
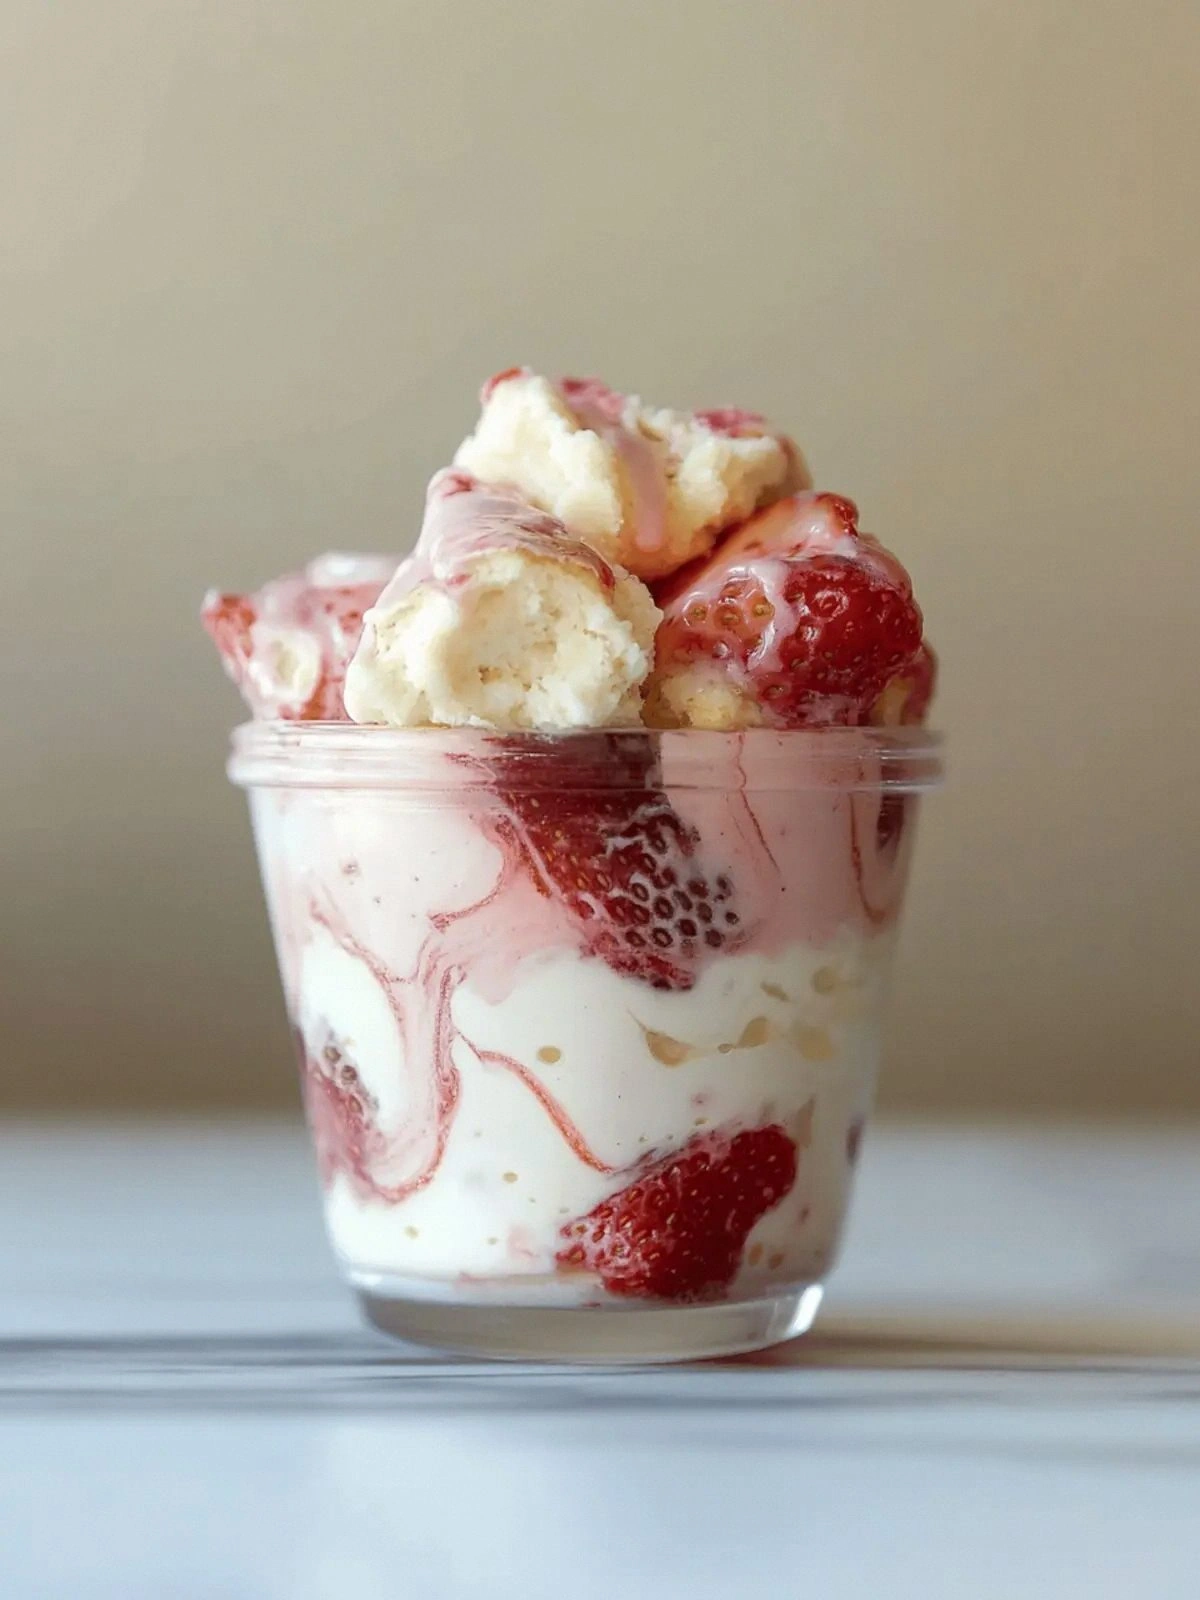
- Visual Appeal: Layered strata of pale pudding, bright red strawberries, and golden wafers produce a dessert that looks as good as it tastes.
- Ease of Preparation: No advanced techniques required—just whisk, fold, chill, and serve.
- Make‑Ahead Potential: The dessert can be assembled up to 24 hours in advance, making it perfect for parties.
- Ingredient Quality: Fresh strawberries and high‑quality vanilla wafers provide a depth of flavor that ordinary substitutes cannot match.
- Audience Appeal: The dish is kid‑friendly, adult‑savvy, and vegan‑friendly (with a few minor swaps).
- Cost‑Effectiveness: The recipe uses pantry staples, keeping the cost low while delivering gourmet results.
Alright, let's break down exactly what goes into this masterpiece…
Inside the Ingredient List
The Flavor Base
Water is the silent hero that activates the vanilla instant pudding mix, allowing it to thicken into a luscious base. This step ensures the pudding is neither too watery nor too dense, striking the perfect balance. If you skip the water, the mixture will remain clumpy and fail to set properly. For a richer taste, you can substitute half the water with heavy cream, but that will increase the overall fat content. The ratio of water to pudding mix is critical; too little water results in a rubbery texture, while too much creates a runny dessert.
The Texture Crew
Sweetened condensed milk is the secret to the dessert’s sweet, buttery mouthfeel. It brings a silky smoothness that complements the vanilla pudding and adds a caramel-like depth. Heavy cream, on the other hand, provides the necessary body and a light, airy feel when folded into the mixture. The combination of these liquids ensures that the pudding holds its structure while remaining moist. If you prefer a lower-fat version, replace half the heavy cream with coconut milk for a subtle coconut undertone.
The Unexpected Star
Fresh strawberries are the crown jewels of this dessert, offering bright color, natural sweetness, and a juicy burst with every bite. Choosing ripe, firm berries ensures they hold their shape during the folding process and don’t release excessive liquid. If you’re in season, opt for organic strawberries for a cleaner flavor. A small twist is to macerate the berries with a teaspoon of sugar before folding; this draws out their juice, intensifying the strawberry flavor. Avoid over-macerating, as it can make the pudding too watery.
The Final Flourish
Vanilla wafers serve a dual purpose: they provide a crisp base that absorbs the pudding’s moisture and a crunchy topping that adds textural contrast. When layered correctly, the wafers create a foundation that supports the pudding and strawberries. The cookies’ subtle vanilla flavor enhances the overall taste profile without overpowering the fruit. For an extra touch, you can lightly toast the wafers before assembly to deepen their flavor and add a nutty aroma. If you’re vegan, use a plant‑based vanilla wafer alternative to keep the dessert cruelty‑free.
Everything's prepped? Good. Let's get into the real action…
The Method — Step by Step
- Begin by whisking the 1.5 cups of water with the 3.4‑ounce vanilla instant pudding mix in a medium bowl until the mixture turns a silky, pale cream. The whisking process is critical; it ensures the pudding mix is fully hydrated, preventing lumps. Once the mixture is smooth, let it sit for a minute to allow the flavors to meld. This brief pause is essential for the pudding to develop its full aroma. When ready, set the bowl aside and allow the mixture to cool slightly.
- In a separate bowl, pour the 14‑ounce can of sweetened condensed milk and the 3 cups of heavy cream. Use a hand mixer on low speed to blend until the mixture is uniform and slightly glossy. The combination of condensed milk and cream creates a rich, buttery base that will give the pudding its luxurious mouthfeel. Be careful not to over‑whisk, as that can introduce air pockets that will disrupt the final texture. Once blended, gently fold the milk‑cream mixture into the pudding base, ensuring a smooth, even consistency.
- Add the 1 cup of sugar to the combined mixture and whisk until the sugar is fully dissolved. This step is vital; undissolved sugar will create a gritty texture that detracts from the dessert’s silky feel. The sugar also enhances the overall sweetness, balancing the tartness of the strawberries. For a lower‑sugar version, you can replace the sugar with a natural sweetener like stevia or monk fruit, but adjust the quantity accordingly. Let the mixture cool to room temperature before proceeding.
- Now, slice the 2 pounds of fresh strawberries into thin, bite‑sized pieces. For a more dramatic presentation, you can arrange the slices in a fan shape on a parchment paper. Gently toss the sliced strawberries with a tablespoon of sugar to macerate; this draws out their juices and intensifies their flavor. Once macerated, set the strawberries aside in a bowl. The strawberries will release a pleasant aroma that will fill the kitchen as the pudding sets.
- Place a layer of vanilla wafers at the bottom of a 9‑inch square dish or a shallow baking tin. The wafers should cover the surface completely, creating a stable base for the pudding. If you prefer a more uniform shape, press the wafers gently to eliminate gaps. This layer will absorb some of the pudding’s moisture, preventing a soggy bottom and adding a delightful crunch. The wafers’ vanilla flavor will complement the pudding’s sweetness, creating a harmonious base.
- Spread the macerated strawberries evenly over the wafer layer, ensuring each piece is fully coated. The strawberries should be slightly submerged in the syrup, creating a juicy burst with every bite. For a more dramatic effect, arrange the strawberries in a radial pattern, allowing the colors to pop against the pale pudding. This step is where the dish starts to look like a masterpiece; the bright red against the pale base is simply stunning.
- Pour the pudding mixture over the strawberries, filling the dish to the top. Use a spatula to spread the mixture evenly, ensuring that the strawberries are fully covered. The pudding should be poured gently to avoid splattering, preserving the dish’s neat appearance. This is a crucial step: the pudding must be poured slowly to avoid creating a thick, uneven layer that could separate during chilling. When the pudding is poured, you’ll notice a subtle, sweet aroma that will fill the kitchen.
- Cover the dish with plastic wrap, pressing the wrap directly onto the surface of the pudding to prevent a skin from forming. Place the dish in the refrigerator for at least 30 minutes, or until the pudding has set and the strawberries are firmly embedded. During this time, the pudding will thicken, and the flavors will meld together into a harmonious whole. Keep an eye on the dish; if it starts to look too firm, give it a quick stir to redistribute the strawberries.
- Once the pudding has set, carefully lift the dish from the fridge. Using a sharp knife, slice the dessert into individual servings. The knife should glide through the pudding effortlessly, revealing the layers of strawberry, pudding, and wafer. If the dessert feels too firm, allow it to sit at room temperature for a few minutes before slicing; this will make cutting easier and prevent the pudding from cracking.
- Serve the dessert chilled, optionally garnishing each slice with a fresh strawberry slice or a drizzle of condensed milk. The final presentation should be a layered masterpiece, with visible strata of pudding, fruit, and wafer. If you wish, add a light dusting of powdered sugar for an elegant touch. The dessert can also be served in individual glasses for a more upscale presentation. Enjoy the burst of flavors and textures that make this dessert unforgettable.
That's it — you did it. But hold on, I've got a few more tricks that'll take this to another level. The next section will reveal insider tips that ensure every bite is flawless, from the perfect temperature to the ideal resting time.
Insider Tricks for Flawless Results
The Temperature Rule Nobody Follows
The pudding sets best at a consistent refrigerator temperature of 35‑38°F. If the fridge is too cold, the pudding can become too firm, making slicing difficult. Conversely, a warmer fridge will produce a runnier pudding that won’t hold its shape. Use a refrigerator thermometer to monitor the temperature, and adjust the placement of the dish if needed. A quick test is to press the surface with your finger; it should yield to a gentle indent and then spring back.
Why Your Nose Knows Best
As the pudding chills, the aroma of vanilla and strawberries will intensify. Trust your nose to gauge the set; when the scent is strong but the pudding remains slightly soft, it’s time to cover and refrigerate. This sensory checkpoint ensures the dessert doesn’t over‑set, which can lead to a dry texture. If you’re in a hurry, you can skip this step, but the flavor will be less pronounced.
The 5‑Minute Rest That Changes Everything
After removing the dessert from the fridge, let it rest at room temperature for exactly five minutes before slicing. This short pause allows the pudding to relax slightly, preventing cracks when you cut through. The rest also lets the strawberries re‑release some of their juices, creating a more harmonious blend. Skip this step and you may end up with a jagged, uneven surface that looks unappetizing.
Using the Right Knife
A serrated knife works best for cutting through the layered dessert. Its saw‑like edge glides through the pudding without crushing the strawberries. A dull blade can tear the layers apart, making the presentation messy. If you don’t have a serrated knife, a straight‑bladed knife with a sharp edge will suffice, but be gentle. The key is to cut with a steady, even motion.
Serving in Glasses for a Fancy Touch
For an elegant presentation, serve the dessert in clear glasses. Layer the wafers, strawberries, and pudding in the glass, creating a visible strata that looks like a miniature cake. This method also makes it easier to portion the dessert for guests. If you prefer a more rustic look, use a shallow dish and serve with a spoon. The choice is yours, but both options deliver the same delicious result.
Adding a Surprise Layer
For an extra wow factor, add a thin layer of raspberry jam between the wafer and strawberry layers. The tartness of the jam contrasts beautifully with the sweetness of the pudding and strawberries. Spread the jam with a small spatula, then add the strawberries. This step is optional but highly recommended for adventurous palates. The jam also adds a subtle color contrast that enhances the visual appeal.
Now that you have the insider knowledge, you can serve this dessert with confidence, knowing each bite will be a masterpiece.
Creative Twists and Variations
Chocolate‑Infused Delight
Swirl a tablespoon of melted dark chocolate into the pudding mixture before pouring. The chocolate will add a rich, bittersweet undertone that pairs beautifully with the strawberries. Keep the chocolate at room temperature to avoid clumping. This variation is perfect for chocolate lovers who still crave a fruity dessert. The result is a decadent, layered treat that feels indulgent.
Minty Freshness
Add a teaspoon of finely chopped fresh mint to the strawberries before macerating. The mint will bring a cool, aromatic note that complements the sweetness. Be careful not to overdo it; too much mint can overpower the strawberries. This twist is ideal for summer gatherings where a refreshing palate is desired. The green garnish also adds a vibrant visual pop.
Almond Crunch
Replace the vanilla wafers with almond‑flavored shortbread cookies for a nutty crunch. The almond flavor will harmonize with the strawberries, creating a subtle, earthy undertone. If you’re allergic to nuts, use a nut‑free cookie alternative. The crunch will contrast nicely with the soft pudding, adding textural variety. This variation is a hit at holiday parties.
Vanilla Bean Swirl
Stir a vanilla bean paste into the pudding mixture for an intensified vanilla flavor. The bean will provide a complex aroma that elevates the entire dessert. Use only a small amount; too much can make the pudding taste bitter. This version is perfect for a sophisticated dinner party. The subtle vanilla notes will linger long after the last bite.
Berry Medley Mix‑Up
Add a handful of blueberries or raspberries to the strawberry mixture for a multi‑berry experience. The combination will create a burst of colors and flavors that excite the palate. Use berries of similar size for even distribution. This variation is ideal for guests who love a variety of fruit textures. The medley also adds a natural tartness that balances the sweetness.
Ginger‑Zest Kick
Grate a small amount of fresh ginger into the pudding mixture for a subtle spicy kick. The ginger will add warmth and depth, complementing the strawberries’ bright sweetness. Keep the ginger minimal to avoid overpowering the dessert. This twist is great for those who enjoy a hint of spice in their sweet treats. The ginger also offers digestive benefits, making the dessert a smart choice for post‑meal indulgence.
This recipe is a playground. Here are some of my favorite ways to switch things up, ensuring each bite is a new adventure.
Storing and Bringing It Back to Life
Fridge Storage
Store the dessert in the refrigerator for up to 48 hours in an airtight container. The airtight seal prevents the pudding from absorbing odors and maintains its moisture level. If you’re serving the dessert later, let it sit at room temperature for 10 minutes before cutting to soften the pudding slightly. Avoid stacking the dessert; place it on a flat surface to preserve its shape. When ready to serve, garnish with fresh strawberries for a vibrant finish.
Freezer Friendly
For longer storage, wrap the dessert tightly in plastic wrap and place it in a freezer bag. It can be frozen for up to two weeks without compromising flavor or texture. To thaw, leave the dessert in the refrigerator overnight, then let it sit at room temperature for 20 minutes. The pudding may separate slightly during freezing; give it a gentle stir before serving to restore its silky consistency. Freezing also allows you to prepare the dessert ahead of time for special occasions.
Best Reheating Method
If you need to warm the dessert, place it in a shallow dish and gently heat it in a 300°F oven for 5 minutes. The heat should be gentle enough to warm the pudding without melting the strawberries. A tiny splash of water before reheating can help steam the pudding back to its original silky texture. After warming, let it cool for a minute before serving. This method preserves the dessert’s structure and ensures a pleasant mouthfeel.