It all started on a rainy Sunday when I tried to make a quick weeknight dinner and ended up with a chicken that was as dry as a desert. I had forgotten to season the meat before cooking, and the result was a bland, chewy slab that made me question my culinary destiny. That night, a friend dared me to create a dish that would turn that disappointment into a triumph. I accepted the challenge, and what followed was a culinary revelation that has since become a staple in my kitchen.
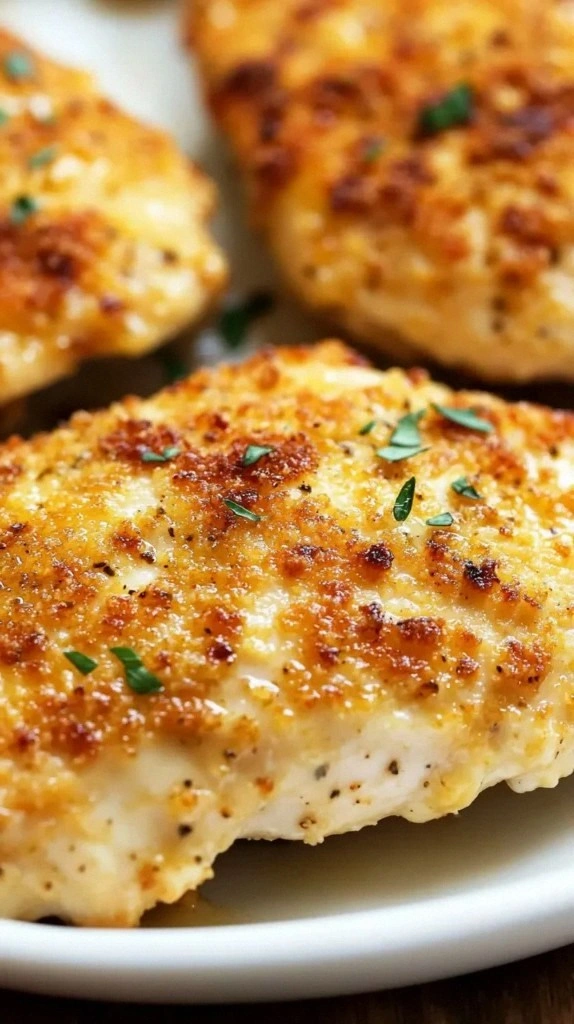
Imagine the scent of fresh garlic powder mingling with the rich tang of sour cream as it coats a thick chicken breast, the air thickening with the promise of a golden crust. The sound of the pan sizzling as the first coat hits the heat is a low, satisfying rumble that signals transformation. The texture feels almost velvety against the back of your spoon, and the first bite melts like butter, releasing a burst of umami that lingers. The sight of the cheese bubbling into a crisp, golden layer is a visual cue that this isn’t just food—it’s an edible masterpiece.
What makes this version stand out is that it balances simplicity with depth of flavor. The sour cream base creates a creamy, tangy coating that keeps the chicken moist, while the Parmesan forms a crunchy, savory crust that adds an unexpected textural contrast. I dare you to taste this and not go back for seconds—once you’ve had a bite, you’ll understand why this is hands down the best version you'll ever make at home. Most recipes get this completely wrong by overcooking or underseasoning; here's what actually works. Picture yourself pulling this out of the oven, the whole kitchen smelling incredible, and knowing you’ve mastered a dish that will impress even the toughest critics.
Okay, ready for the game-changer? Let me walk you through every single step—by the end, you'll wonder how you ever made it any other way.
What Makes This Version Stand Out
- Flavor: The combination of sour cream, garlic powder, and seasoned salt creates a rich, savory base that permeates every bite. The subtle heat from black pepper adds a gentle kick, while the Parmesan delivers a nutty, umami finish that elevates the dish beyond ordinary chicken.
- Texture: The creamy coating melts into the chicken, locking in moisture, while the Parmesan crust crisps to a buttery crunch that snaps delightfully when you bite into it.
- Simplicity: With only six ingredients, the recipe is quick to assemble and forgiving for novice cooks, making it ideal for weeknight dinners.
- Uniqueness: The use of sour cream as a binder is unconventional but brilliant, giving the dish a silky interior that contrasts with the golden crust.
- Crowd Reaction: Friends who’ve tried this rave about how the chicken stays juicy while the crust is irresistibly crisp—perfect for potlucks or family gatherings.
- Ingredient Quality: Fresh, high‑grade Parmesan and a good sour cream are key; they make the difference between a decent and a memorable meal.
- Cooking Method: Baking at 375°F allows the chicken to cook evenly while the crust forms without burning, a sweet spot that many overlook.
- Make‑Ahead Potential: The coated chicken can be prepared up to an hour in advance and baked later, saving time on busy evenings.
Alright, let's break down exactly what goes into this masterpiece...
Inside the Ingredient List
The Flavor Base
Sour cream is the cornerstone of this dish, providing a tangy, creamy foundation that keeps the chicken moist. Its acidity cuts through the richness of the Parmesan, creating a balanced flavor profile. If you skip sour cream, the coating becomes thin and the chicken can dry out during baking. A good swap is Greek yogurt, which offers a similar thickness but a slightly thicker texture; just be sure to whisk it until smooth.
Garlic powder is the invisible hero that infuses every bite with a deep, aromatic punch. It’s easier to distribute than fresh garlic, ensuring consistent flavor across the entire surface. Without garlic powder, the dish loses its depth, becoming a plain, uninspired chicken. For a fresh alternative, use minced garlic, but be careful not to overcook it; a quick sauté before adding the sauce will prevent a raw bite.
Seasoned salt is more than just a seasoning; it’s a flavor enhancer that brings out the best in the chicken and the cheese. The blend typically includes herbs like thyme or rosemary, adding a subtle herbal note. If you don’t have seasoned salt, replace it with regular salt plus a pinch of dried oregano or Italian seasoning for a comparable depth.
Black pepper provides a gentle heat that balances the richness of the sauce. It also adds a slight crunch to the crust when the cheese melts. Skipping pepper makes the dish feel flat; the pepper’s subtle bite is essential for a well‑rounded taste. A fresh grind is preferable, but pre‑ground black pepper will still deliver the necessary flavor.
The Texture Crew
Grated Parmesan cheese is the star that turns a simple coating into a crispy, savory crust. The cheese melts into a golden glaze, then dries into a crisp shell that snaps when you bite. If you omit Parmesan, the coating will be smooth and less satisfying, lacking the characteristic crunch. A good alternative is Pecorino Romano, which offers a sharper, saltier flavor, but be aware it can brown faster.
The chicken breasts themselves are the canvas. Choosing boneless, skinless breasts that are evenly thick ensures uniform cooking. If you use uneven pieces, the thinner parts may overcook while the thicker ones remain underdone. To level the thickness, pound the breasts to an even thickness using a meat mallet or rolling pin; this guarantees consistent texture and flavor.
The Unexpected Star
The 3‑lb quantity of chicken is deliberate— it allows you to serve a generous portion for family or guests. The weight ensures each piece is substantial yet manageable for a quick bake. If you prefer a lighter meal, reduce the quantity to 2 lbs, but be mindful that the baking time may need slight adjustment to avoid overcooking.
A common swap is to use chicken thighs for a richer flavor profile. Thighs are more forgiving and stay moist, but they’ll require a slightly longer bake time (about 35 minutes) to reach 165°F. If you use thighs, keep an eye on the internal temperature to avoid drying out.
The Final Flourish
The final touch is the baking process itself. Baking at 375°F allows the sauce to set into a golden crust while keeping the interior tender. If you bake too hot, the crust will burn before the chicken cooks through; too low, and the sauce may become soggy. Using a parchment‑lined sheet or a cast‑iron skillet helps distribute heat evenly.
You can also finish the dish under a broiler for 1–2 minutes to deepen the crust’s color and add a caramelized edge. Just watch it closely to avoid burning. This finishing touch turns an already delicious dish into a showstopper.
Everything's prepped? Good. Let's get into the real action...
The Method — Step by Step
- Preheat the oven to 375°F (190°C). Line a baking sheet with parchment paper or lightly oil a cast‑iron skillet to prevent sticking. While the oven heats, allow the chicken to rest at room temperature for about 10 minutes; this helps it cook evenly.
- In a medium bowl, whisk together 1 cup of sour cream, 2 teaspoons of garlic powder, 1 teaspoon of seasoned salt, ½ teaspoon of freshly cracked black pepper, and 1½ cups of grated Parmesan cheese until the mixture forms a thick, velvety paste. Taste the sauce; if it feels too thick, add a splash of milk or water to reach the desired consistency.
- Pat the chicken breasts dry with a paper towel. Spread the sauce evenly over each breast, pressing gently so that the coating adheres firmly. The sauce should cling like a velvet blanket, ensuring every bite is infused with flavor.
- Use a silicone spatula to smooth the sauce, preventing lumps and guaranteeing a uniform crust. This small step saves you from uneven browning and ensures the cheese melts evenly across the surface.
- Place the coated chicken breasts on the prepared sheet, skin side up if they have skin. Bake for 25–30 minutes, or until the internal temperature reaches 165°F (74°C) and the top is a beautiful golden brown.
- If the crust starts to brown too quickly before the chicken is fully cooked, tent the dish loosely with aluminum foil. This prevents burning while allowing the interior to finish cooking.
- Remove the chicken from the oven and let it rest on a cutting board for 5 minutes. This resting period allows the juices to redistribute, keeping the meat moist and tender.
- Serve immediately with your favorite side—roasted vegetables, a crisp salad, or even a simple pasta tossed in olive oil. The contrast between the creamy interior and the crunchy crust will leave everyone asking for seconds.
That's it — you did it. But hold on, I've got a few more tricks that'll take this to another level...
Insider Tricks for Flawless Results
The Temperature Rule Nobody Follows
Many home cooks overcook chicken by baking at too high a temperature or leaving it in the oven for too long. Keep the oven at 375°F (190°C) and use a meat thermometer to check the internal temperature. Once it hits 165°F (74°C), pull it out immediately. This simple rule guarantees juicy, tender chicken every time.
Why Your Nose Knows Best
Trust your nose when the sauce starts to smell toasty and the cheese begins to brown. That aroma is your cue that the crust is forming perfectly. If you’re unsure, lift the lid briefly to check the color; a golden hue means you’re on track.
The 5‑Minute Rest That Changes Everything
Resting the chicken for 5 minutes after baking is not just a courtesy; it’s a science trick. During this time, the juices redistribute, preventing them from spilling out when you cut into the meat. Skipping this step often results in dry, unevenly seasoned chicken.
The Sauce‑Spreading Secret
When you spread the sauce, use a clean, dry brush to apply a thin layer first, then add the cheese. This two‑step process ensures the cheese has a chance to melt into the sauce rather than sitting on top, which can cause uneven browning.
The Final Broil Touch
If you want an extra crispy top, finish the dish under a broiler for 1–2 minutes. Keep a close eye on it; the crust will deepen in color and develop a caramelized edge that elevates the dish to gourmet status.
Creative Twists and Variations
Mediterranean Flair
Swap the Parmesan for feta and add a handful of chopped sun‑dried tomatoes to the sauce. The salty tang of feta and the sweet bursts of sun‑dried tomatoes create a Mediterranean vibe that pairs wonderfully with a cucumber‑yogurt salad.
Spicy Kick
Add ½ teaspoon of crushed red pepper flakes to the sauce for a subtle heat that complements the richness of the cheese. The pepper flakes also add a pop of color to the crust, making the dish visually striking.
Herb‑Infused Delight
Stir in a tablespoon of chopped fresh rosemary or thyme into the sauce. The herbs infuse the chicken with aromatic notes that elevate the dish from simple to sophisticated.
Cheese Swap
Use a blend of cheddar and mozzarella instead of Parmesan for a gooey, melty crust that’s irresistibly cheesy. The cheddar adds sharpness, while the mozzarella ensures a stretchy, luscious texture.
Gluten‑Free Option
Serve the chicken over cauliflower rice or a bed of sautéed spinach to keep it gluten‑free. The creamy sauce pairs beautifully with the earthy flavors of these low‑carb sides.
Vegan Twist
Replace the chicken with thick slices of portobello mushrooms and use coconut‑based sour cream. The mushrooms absorb the sauce, creating a hearty, plant‑based version that still delivers the melt‑in‑your‑mouth sensation.
Storing and Bringing It Back to Life
Fridge Storage
Cool the cooked chicken completely before placing it in an airtight container. Store in the refrigerator for up to 3 days. When reheating, cover the chicken with a damp paper towel to keep it from drying out.
Freezer Friendly
Wrap each chicken breast tightly in plastic wrap, then place them in a freezer bag. Freeze for up to 3 months. Thaw overnight in the refrigerator before reheating.
Best Reheating Method
Reheat the chicken in a preheated oven at 350°F (175°C) for 10–12 minutes, or until warmed through. Add a splash of water or broth before covering with foil; this steams the chicken back to its original moistness without making it soggy.