Picture this: I was standing in a cramped kitchen, staring at a bag of flour and a stubborn yeast packet, when my friend dared me to make the ultimate Korean twisted donut. I laughed, because I never thought a donut could be both a pastry and a Korean street‑food staple. The next thing I knew, I was mixing, kneading, and twisting dough that smelled like warm milk and sweet sugar. The moment the dough began to rise, I felt the familiar buzz of anticipation that only good food can spark. I was ready to prove that even a simple recipe can become legendary. I promised myself that this would be the best version anyone could make at home.
From the first swirl of flour, the kitchen filled with a sweet, buttery aroma that made my mouth water. The sound of the dough slapping against the countertop was almost a drumbeat, urging me forward. I could feel the dough’s elastic texture, soft yet resilient, as I folded it over itself again and again. The taste of that first bite, crisp on the outside and airy inside, was a revelation that made my taste buds sing. The visual of the dough turning golden as it fried was a promise of perfection. Each sensory note was a reminder that cooking is an adventure, not just a task.
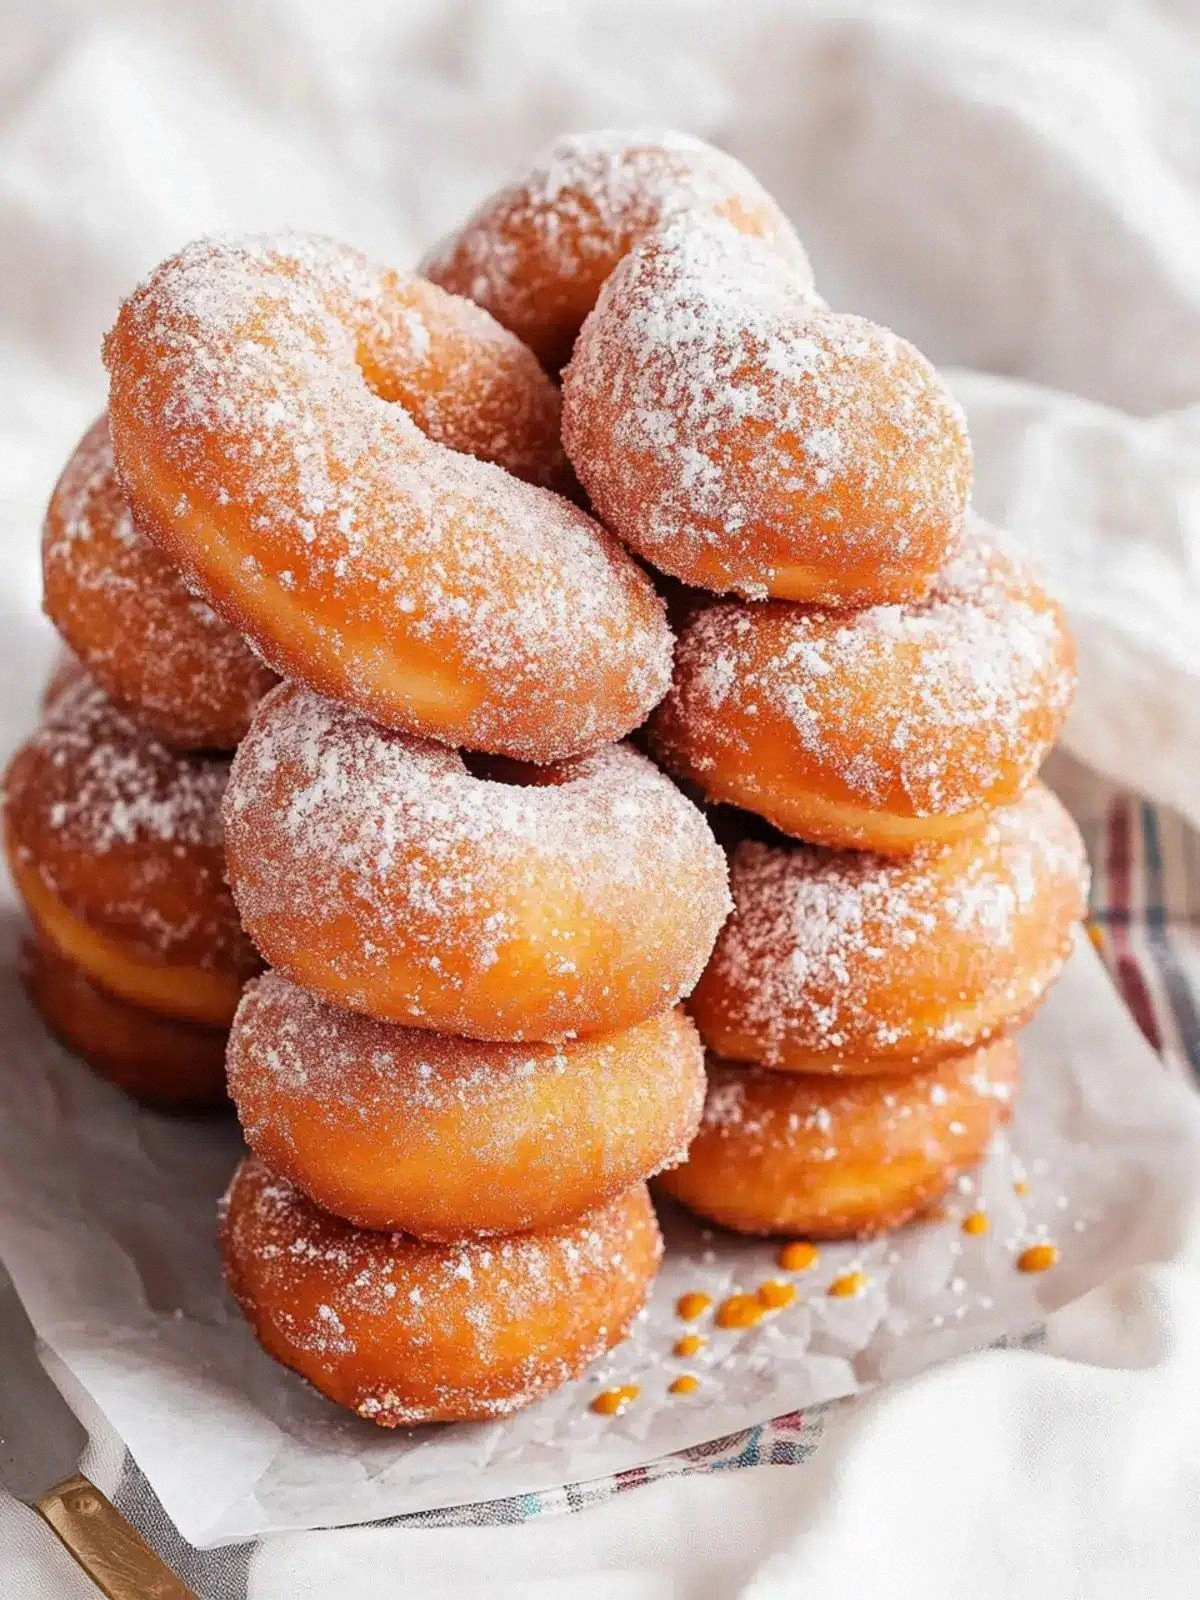
Unlike most donut recipes that rely on heavy, sugary batters, this Korean twisted D uses a subtle yeast lift that creates a light, airy crumb without the need for a leavening agent that overwhelms the flavor. The twist technique not only adds a playful aesthetic but also traps pockets of air that burst with each bite. The glaze, made from a simple reduction of milk and sugar, coats the donuts like velvet, delivering a caramelized finish that lingers on the tongue. The dough’s buttery richness, paired with a hint of salt, balances the sweetness and prevents the donuts from feeling cloying. The result is a snack that is both indulgent and sophisticated, a true crowd‑pleaser that will leave guests asking for seconds. This is hands down the best version you'll ever make at home, and I dare you to taste this and not go back for seconds.
One of the secrets that sets these donuts apart is the use of a small amount of vinegar in the dough, a trick borrowed from Korean street vendors to help activate the yeast and give the donuts a slightly tangy undertone. Another unexpected twist is the use of a quick dip in a sugar‑cinnamon bath that gives the donuts a subtle crunch and a hint of spice. If you’re curious about how to achieve that perfect golden crust without a deep fryer, stay tuned, because I’ll walk you through every single step. By the end, you’ll wonder how you ever made it any other way. Let me walk you through every single step — by the end, you'll wonder how you ever made it any other way.
What Makes This Version Stand Out
- Flavor Harmony: The delicate balance between sweet and savory is achieved by adding a pinch of salt to the dough, which elevates the sweetness without overpowering it.
- Light Texture: The yeast activation technique creates a cloud‑like crumb that melts in your mouth, unlike the dense, heavy donuts you might have tried.
- Visual Appeal: The twisted shape not only looks elegant but also helps the glaze cling evenly, giving each donut a glossy, irresistible finish.
- Time Efficiency: With a quick proofing period and a fast frying method, you can have fresh donuts ready in under 45 minutes.
- Ingredient Simplicity: The recipe relies on pantry staples, making it accessible even for those who don’t shop for specialty ingredients.
- Versatility: The base dough can be flavored with cinnamon, cocoa, or matcha, allowing endless customization.
- Make‑Ahead Friendly: The dough can be prepared a day ahead, refrigerated, and fried fresh, making it perfect for parties or brunches.
Inside the Ingredient List
The Flavor Base
All-purpose flour provides the structural backbone of the donuts, giving them the necessary gluten network to hold their shape during frying. Granulated sugar not only sweetens but also aids in browning, creating that caramelized crust we all crave. Instant dry yeast is the secret engine that lifts the dough, and its small amount ensures a light, airy crumb. Warm milk activates the yeast and adds richness, while the large egg binds everything together and contributes to the golden hue. Unsalted butter melts into the dough, delivering a buttery mouthfeel that pairs beautifully with the sweet glaze. A half teaspoon of salt is the unsung hero that balances flavors and prevents the donuts from tasting too sweet. Together, these ingredients form a harmonious base that is both simple and sophisticated.
The Texture Crew
The dough’s elasticity comes from the gluten formed in the flour when it’s mixed with liquid. Butter, when incorporated at the right time, creates a tender crumb that melts in your mouth. The amount of oil used for frying—four to six cups of vegetable or avocado oil—determines the crispness of the outer shell. A high smoke point oil ensures a golden finish without imparting a burnt flavor. The oil’s temperature, maintained between 350°F and 375°F, is crucial for a crisp exterior and a moist interior. The right balance of oil and dough thickness guarantees a satisfying crunch that snaps like thin ice.
The Unexpected Star
Vinegar, a small addition to the dough, is a game‑changer. It activates the yeast faster, giving the dough a subtle tang that echoes Korean street‑food traditions. This acidity also helps the dough rise more evenly, preventing dense pockets. The vinegar’s flavor is barely detectable, yet it adds a depth that elevates the overall taste profile. Many recipes skip this step, missing out on a subtle complexity that makes the donuts truly unique.
The Final Flourish
The glaze is a simple reduction of milk and sugar, cooked until it thickens to a glossy consistency. Adding a pinch of cinnamon or nutmeg during the glaze’s simmering phase introduces a subtle warmth that complements the donuts’ sweetness. Once the donuts are fried, a quick dip in the glaze ensures even coating, creating a shiny, caramelized surface. The glaze also helps seal in moisture, preventing the donuts from drying out during storage. A final dusting of powdered sugar or a swirl of chocolate drizzle adds visual appeal and a contrasting texture.
The Method — Step by Step
- Begin by whisking together 3 cups of all‑purpose flour, ¼ cup of granulated sugar, 2¼ teaspoons of instant dry yeast, and ½ teaspoon of salt in a large mixing bowl. The dry mix should feel like a fine, fragrant sand. This is the foundation that will carry all the flavors. Keep the mixture aside while you prepare the wet components. The dry ingredients should be evenly distributed to avoid clumps. This step is crucial for a consistent dough.
- In a small saucepan, warm 1 cup of milk to about 110°F (43°C). Stir in 2¼ teaspoons of yeast and let it sit for 5 minutes until it becomes frothy, signaling activation. This froth indicates that the yeast is alive and ready to leaven the dough. A frothy mixture ensures a light, airy crumb. If the mixture remains liquid, the yeast may be dead; discard and start over. This small step can make or break the final texture.
- Whisk 1 large egg into the warm milk, then add 2 tablespoons of unsalted butter, cut into small cubes. The butter should melt into the mixture, creating a silky liquid. This combination adds richness and helps bind the dough. The egg contributes structure and color. The butter’s fat content also assists in achieving a golden crust during frying. This step should be done quickly to keep the mixture from cooling too much.
- Combine the wet mixture with the dry ingredients, stirring until a shaggy dough forms. Knead the dough on a floured surface for about 5 minutes until it becomes smooth and elastic. A well-kneaded dough will rise evenly and hold its shape. If the dough feels sticky, sprinkle a light dusting of flour; if too dry, add a splash of milk. This stage is where the dough starts to feel alive.
- Place the dough in a lightly greased bowl, cover it with a damp cloth, and let it rise in a warm spot for 1 hour or until it doubles in size. The dough should look airy and slightly puffy. This first proof is essential for achieving the light crumb. If the dough fails to rise, the yeast may have been expired. Keep the dough away from direct drafts. This step allows the flavors to meld.
- After the dough has risen, punch it down to release excess air, then divide it into 12 equal pieces. Roll each piece into a tight ball and then twist it twice, creating a spiral. The twist not only looks appealing but also helps the glaze adhere evenly. The dough should feel firm yet pliable. This process is best done with a clean, dry surface.
- Heat 4–6 cups of oil in a deep pan to 350°F (175°C). Test the temperature by dropping a small piece of dough; it should sizzle immediately and rise to the surface within 30 seconds. Maintaining the right temperature ensures a crisp exterior without absorbing excess oil. If the oil is too hot, the donuts will burn on the outside while remaining raw inside. If too cool, they’ll become greasy. This step is the most critical for texture.
- Fry the donuts in batches, turning them gently until they are golden brown on all sides, about 2–3 minutes per side. Remove them with a slotted spoon and drain on a rack or paper towels to remove excess oil. While they’re still hot, dip each donut in the pre‑prepared glaze, ensuring an even coating. Let the glaze set for a few minutes before serving. The donuts should feel crisp on the outside and soft inside, with a glossy, caramelized finish. This final step brings all the flavors together.
Insider Tricks for Flawless Results
The Temperature Rule Nobody Follows
Many home cooks guess the oil temperature, but precision is key. A thermometer ensures the oil stays between 350°F and 375°F. If the oil dips below 350°F, the donuts will soak up oil and become soggy. If it climbs above 375°F, the exterior will burn before the interior cooks. I once fried at 400°F, and the donuts were crisp but tasted like burnt sugar. Keep the heat steady by adjusting the burner after each batch.
Why Your Nose Knows Best
Before you start frying, let the dough rest for 15 minutes. The aroma of a properly proofed dough is sweet, yeasty, and inviting. This smell signals that the yeast is active and the dough will rise nicely. A lack of aroma can mean the yeast is dead or the dough hasn’t rested enough. Trust your nose; it’s a reliable indicator of freshness.
The 5-Minute Rest That Changes Everything
After you finish twisting the dough, let it rest for five minutes before frying. This brief pause allows the gluten to relax, preventing the donuts from shrinking during frying. It also gives the surface a chance to form a protective crust that holds the glaze. I’ve seen doughs that were fried immediately become rubbery; the rest makes a world of difference.
Avoiding Oil Drips
When you drop a donut into hot oil, the surface should sizzle and the donut should rise. If it sinks or drips, the oil temperature is too low. Keep the oil at the right heat and use a ladle or tongs to gently lower the donut. This technique ensures even cooking and a crisp finish.
The Perfect Twisting Technique
To achieve a clean twist, roll each ball into a tight cylinder before twisting twice. Hold the dough with a firm grip to keep the shape from unraveling during frying. A consistent twist guarantees even glaze coating. If the twist is loose, the glaze may pool in one spot, creating a mess.
Quick Cooling Trick
Once the donuts are fried, place them on a wire rack to cool. This prevents steam from building underneath, which can soften the crust. A quick cool also lets the glaze set properly. If you let them sit on paper towels, the excess oil will drip back, ruining the crispness. Keep them on a rack for at least 5 minutes.
Creative Twists and Variations
This recipe is a playground. Here are some of my favorite ways to switch things up:
Matcha Sweet Twist
Add a tablespoon of matcha powder to the dry mix for a green tea flavor that pairs wonderfully with the caramel glaze. The earthy tones complement the sweet dough, creating a balanced taste. Serve with a drizzle of honey for an extra touch of sweetness. This version is perfect for spring brunches or tea parties.
Cinnamon Sugar Delight
Replace the regular glaze with a cinnamon‑sugar glaze made from powdered sugar, milk, and a pinch of ground cinnamon. The warm spice adds depth and pairs beautifully with the buttery dough. Dust the finished donuts with extra cinnamon sugar for a crunchy finish. This variation is a crowd‑pleaser at holiday gatherings.
Savory Kimchi Glaze
Whisk kimchi juice with a splash of soy sauce and a touch of honey to create a savory glaze that gives the donuts an umami kick. The tangy kimchi flavor contrasts with the sweet dough, creating a bold flavor profile. Serve with a side of spicy mayo for a full Korean street‑food experience.
Chocolate Drizzle
Melt dark chocolate with a splash of milk and drizzle it over the cooled donuts. The rich chocolate coats the donuts, creating a decadent treat. Add a sprinkle of sea salt on top to enhance the chocolate’s sweetness. This version is ideal for chocolate lovers and dessert parties.
Coconut Milk Infusion
Replace the warm milk with coconut milk for a tropical twist. The coconut adds a subtle sweetness and a fragrant aroma that complements the glaze. Finish with shredded coconut on top for added texture. This version is great for summer picnics.
Spicy Gochujang Glaze
Stir gochujang paste with honey, soy sauce, and a splash of rice vinegar to create a spicy glaze. The heat from the gochujang adds excitement to the sweet dough, making it a conversation starter. Serve with a side of fresh cucumber slices for a cooling contrast.
Storing and Bringing It Back to Life
Fridge Storage
Store leftover donuts in an airtight container in the refrigerator for up to three days. Keep them on a paper towel to absorb excess moisture. The donuts will stay moist but may lose a bit of crispness. Reheat them in a 350°F oven for 5 minutes to restore crunch.
Freezer Friendly
Freeze donuts in a single layer on a parchment‑lined tray before transferring to a freezer bag. They can be stored for up to two months. Thaw at room temperature for 30 minutes before reheating. The texture remains excellent if reheated properly.
Best Reheating Method
To revive frozen or refrigerated donuts, preheat the oven to 350°F (175°C). Place donuts on a baking sheet and bake for 5–7 minutes. This method restores the crisp exterior while keeping the interior soft. Avoid microwaving, as it will make the donuts soggy.