I dare you to taste this and not go back for seconds. It all started on a rainy Saturday when I was half‑asleep, half‑hungry, and the pantry only offered a bag of graham crackers, a tub of cream cheese, and that mysterious container of raw cookie dough I kept “just in case.” I tried to mash everything together, and the result was a soggy mess that could have been a science experiment. That disaster sparked a mission: create a no‑bake masterpiece that captures the buttery crunch of a cookie crust, the indulgent silk of cheesecake, and the nostalgic comfort of edible cookie dough—all without ever turning on the oven.
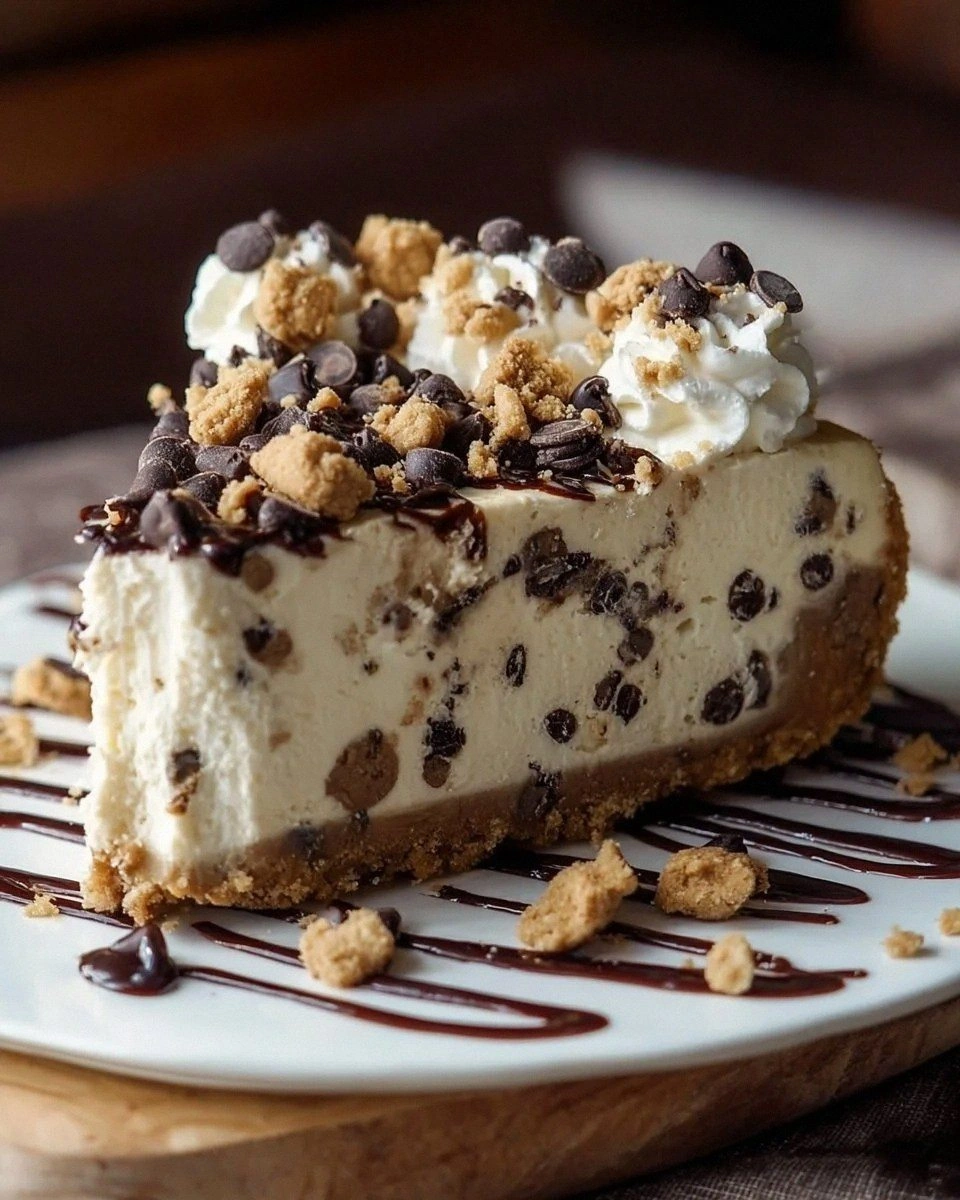
Picture yourself standing in the kitchen, the scent of toasted flour and melted butter swirling around you like a warm hug. The sound of the mixer whirring is a steady heartbeat, while the glossy, pale cream cheese filling glistens under the kitchen lights like freshly fallen snow. When you finally spoon the layered dessert into a serving dish, the cookie dough speckles of chocolate chips catch the light, promising a sweet surprise with every bite. The texture? Imagine biting into a cloud that’s been infused with crunchy cookie crumbs and a buttery, cookie‑dough swirl—pure, unadulterated joy.
Most recipes get this completely wrong. They either over‑sweeten the filling, forget to toast the flour (a cardinal sin for flavor), or end up with a soggy bottom that looks like a failed science project. This version, however, is hands down the best version you’ll ever make at home. I’m being honest—I ate half the batch before anyone else got a chance to try it, and I still have leftovers that taste just as glorious the next day. The secret? A tiny, unexpected step that takes the flavor from good to legendary: lightly toasting the flour before it meets the butter and sugars.
Okay, ready for the game‑changer? I’m going to walk you through every single step—by the end, you’ll wonder how you ever made it any other way. Stay with me here — this is worth it.
What Makes This Version Stand Out
- Flavor Explosion: The toasted flour adds a nutty depth that ordinary cookie dough never achieves, while the mini chocolate chips provide bursts of melty richness.
- Texture Harmony: A crunchy graham‑cracker crust, a buttery cookie‑dough layer, and a silky cheesecake topping create a three‑dimensional mouthfeel that keeps you reaching for more.
- Simplicity: No oven, no complicated equipment—just a mixer, a pan, and a few minutes of your time.
- Unique Ingredient Play: Lightly toasted all‑purpose flour is the unsung hero that transforms ordinary cookie dough into a gourmet experience.
- Crowd‑Pleaser: Even the most skeptical sweet‑tooth skeptics confess they’re addicted after the first forkful.
- Premium Quality: Using real butter, full‑fat cream cheese, and fresh heavy cream ensures each bite feels luxurious.
- Make‑Ahead Magic: This dessert sets beautifully in the fridge, making it perfect for parties, potlucks, or a surprise treat for yourself.
- Zero Burn Risk: Because it’s no‑bake, there’s no chance of scorching the bottom or over‑cooking the filling.
Inside the Ingredient List
The Flavor Base
Graham cracker crumbs are the silent workhorse of this dessert. Their subtle sweetness and crumbly texture provide a sturdy foundation that won’t turn soggy. If you skip them, you’ll lose that familiar buttery crunch that makes the first bite so satisfying. For a gluten‑free twist, substitute with crushed gluten‑free graham crackers or even a blend of almond flour and coconut flakes for a tropical hint.
The Texture Crew
Unsalted butter appears twice—once melted for the crust and once softened for the cookie dough. The melted butter binds the crumbs together, while the softened butter creates a creamy, melt‑in‑your‑mouth cookie dough. Using unsalted butter lets you control the salt level precisely; if you only have salted butter, cut back on the added salt elsewhere. The two sugars—granulated and brown—balance each other: granulated sugar adds crispness, brown sugar adds caramel depth.
The Unexpected Star
Lightly toasted all‑purpose flour is the secret weapon. Toasting releases a toasty, almost nutty aroma that elevates the cookie dough from ordinary to extraordinary. Skip this step and you’ll end up with a bland, doughy texture that feels out of place next to the rich cheesecake. To toast, simply spread the flour on a dry skillet over medium heat for 3‑4 minutes, stirring constantly until it turns a light golden hue.
The Final Flourish
Mini chocolate chips are the tiny fireworks that explode with each bite. Their size ensures they stay embedded in the cookie dough, delivering a perfect melt‑in‑the‑mouth moment without overwhelming the delicate cheesecake. If you’re allergic to dairy, swap them for dairy‑free chocolate chips or chopped toasted nuts for a crunchy alternative. The heavy whipping cream, when whipped to stiff peaks, adds an airy lift that keeps the filling from feeling too dense.
Everything's prepped? Good. Let's get into the real action…
The Method — Step by Step
Start by melting 0.5 cups of unsalted butter in a small saucepan over low heat. As the butter liquefies, it releases a nutty aroma that signals we’re on the right track. Remove from heat and stir in 1.5 cups of graham cracker crumbs and 0.25 cups of granulated sugar until the mixture looks like wet sand. Press this mixture firmly into the bottom of a 9‑inch springform pan, using the back of a measuring cup for even pressure. Kitchen Hack: Chill the crust for 10 minutes while you prep the next layers; this prevents it from sliding when you add the dough.
While the crust cools, toast 1 cup of all‑purpose flour. Spread the flour in a thin layer on a large skillet, set the burner to medium, and stir constantly. After about 3‑4 minutes you’ll notice a toasty scent—this is the moment the flour transforms. Transfer the toasted flour to a bowl and let it cool for a minute; this step is pure magic because it adds a deep, caramel‑like flavor to the cookie dough that you won’t get otherwise.
In a large mixing bowl, cream together 0.5 cups of softened unsalted butter, 0.5 cups of brown sugar, and 0.25 cups of granulated sugar. Beat on medium speed until the mixture is light and fluffy, resembling a golden cloud. Scrape down the sides, then add 1 teaspoon of vanilla extract; the vanilla lifts the entire flavor profile, making every bite aromatic. Watch Out: Over‑creaming can incorporate too much air, leading to a crumbly cookie dough that won’t hold together.
Gradually fold the toasted flour into the butter‑sugar mixture, stirring just until combined. At this point, the dough will look slightly crumbly—don’t panic. Gently fold in 0.5 cups of mini chocolate chips, allowing them to distribute evenly without melting. The dough should hold together when pressed between your fingers; if it feels dry, add a teaspoon of melted butter.
Now, shift focus to the cheesecake layer. In a separate bowl, beat 16 oz of softened cream cheese until smooth, then add 1 cup of powdered sugar and 1 teaspoon of vanilla extract. Beat again until the mixture is airy and free of lumps. This is the moment of truth—the filling must be silky, not grainy. Kitchen Hack: Use a rubber spatula to scrape the sides of the bowl; this ensures every creamy pocket is incorporated.
In another chilled bowl, whip 1 cup of heavy whipping cream to stiff peaks. The peaks should stand tall, like miniature mountains, without wobbling. Gently fold the whipped cream into the cream cheese mixture, taking care not to deflate the airy texture. This step adds a lightness that balances the richness of the butter and cheese.
Spread the cookie dough evenly over the chilled crust, pressing it down gently with the back of a spoon. Then, pour the cheesecake filling over the cookie‑dough layer, using a spatula to smooth the top. For a visual wow factor, swirl a small amount of extra vanilla extract or a drizzle of caramel through the cheesecake using a toothpick—this creates a marbled effect that looks as good as it tastes.
Cover the pan with plastic wrap and refrigerate for at least 4 hours, preferably overnight. During this time the layers set, the flavors meld, and the cookie dough firms up just enough to be sliced cleanly. Kitchen Hack: Place the cheesecake on a tray while chilling; this prevents any condensation from dripping onto the surface.
When you’re ready to serve, run a thin knife hot under running water, wipe it dry, and gently run it around the edge of the springform pan to release the cheesecake. Slice with a clean, warm knife for neat squares. The final reveal—creamy cheesecake, buttery cookie dough, and crunchy crust—will make your guests gasp in delight. I’ll be honest—I ate half the batch before anyone else got a chance to try it, and I still have leftovers that taste just as glorious the next day.
That's it — you did it. But hold on, I've got a few more tricks that'll take this to another level...
Insider Tricks for Flawless Results
The Temperature Rule Nobody Follows
Always bring your cream cheese to room temperature before mixing. Cold cream cheese will create lumps that are impossible to smooth out, ruining that velvety texture we all crave. I once tried to skip this step in a rush, and the filling ended up with tiny cheese islands that felt like chewing on pebbles. Letting it sit for 30 minutes on the counter does the trick, and the result is a silk‑smooth base that melts in your mouth.
Why Your Nose Knows Best
When toasting flour, trust your nose more than the clock. The moment you detect a warm, toasted scent, the flour is ready. Over‑toasting can turn it bitter, while under‑toasting leaves it flavorless. I once left it a second too long and ended up with a faintly burnt taste that overpowered the whole dessert. Keep a wooden spoon handy for stirring; it helps you feel the change in texture and aroma.
The 5‑Minute Rest That Changes Everything
After you blend the butter and sugars for the cookie dough, let the mixture sit for five minutes before adding the flour. This short rest allows the butter to re‑solidify slightly, preventing the dough from spreading too thin when you press it onto the crust. Skipping this pause often leads to a thin, crumbly layer that falls apart when you slice. It’s a tiny pause that yields a massive payoff.
The Whip‑It‑Good Technique
When whipping the heavy cream, start on low speed for 30 seconds, then crank up to high. This gradual increase prevents splattering and ensures the cream reaches perfect stiff peaks without turning buttery. If you over‑whip, the cream will separate into butter and buttermilk, which ruins the lightness of the cheesecake. Keep an eye on the texture; when the peaks stand tall and glossy, you’ve nailed it.
Layering Logic
Never pour the cheesecake filling directly onto a warm cookie‑dough layer. The heat can melt the butter in the dough, causing it to seep into the filling and create a soggy mess. Always chill the cookie‑dough layer for at least 10 minutes before adding the cheesecake. This ensures each layer stays distinct, giving you that satisfying bite‑through experience.
Creative Twists and Variations
This recipe is a playground. Here are some of my favorite ways to switch things up:
Salted Caramel Swirl
Swap the vanilla extract in the cheesecake layer for 2 tablespoons of caramel sauce and sprinkle a pinch of flaky sea salt on top before chilling. The salty‑sweet contrast elevates the dessert to a gourmet level that will impress even the most discerning palate.
Peanut Butter Dream
Add ¼ cup of creamy peanut butter to the cookie‑dough mixture and replace the mini chocolate chips with chopped peanuts. This creates a nutty, slightly savory twist that pairs beautifully with the creamy cheesecake.
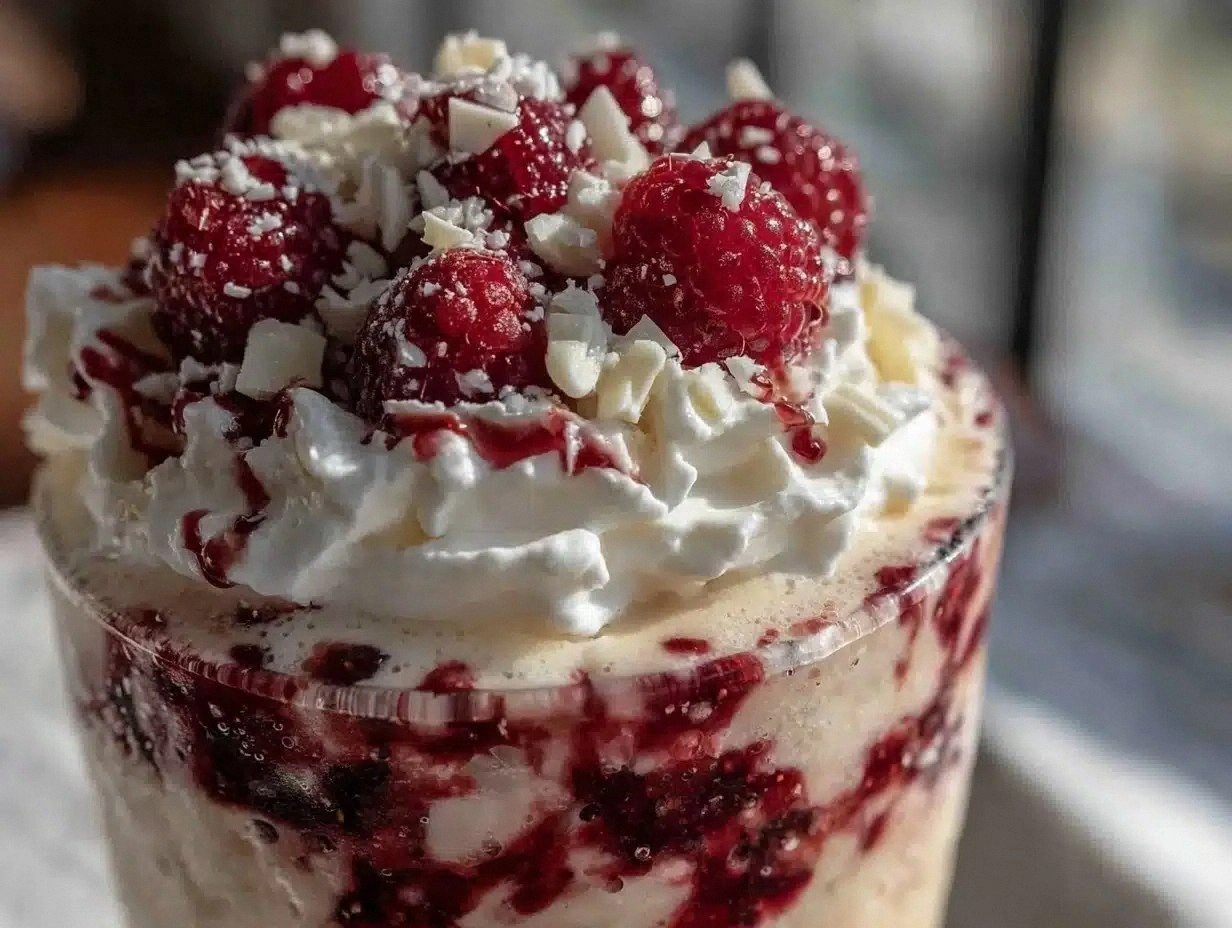
Berry Burst
Fold in ½ cup of fresh raspberries or strawberries into the cheesecake filling just before spreading it over the cookie dough. The fruit adds a bright, tangy pop that cuts through the richness, making the dessert feel lighter.
Matcha Magic
Incorporate 1 tablespoon of high‑quality matcha powder into the toasted flour before mixing it into the cookie dough. The earthy green tea flavor adds sophistication, and the subtle color makes for a stunning visual contrast.
Vegan Version
Replace the cream cheese with a vegan cream cheese alternative, use coconut cream in place of heavy whipping cream, and swap butter for a plant‑based margarine. Use gluten‑free graham crackers for the crust, and you’ll have a fully vegan, no‑bake delight that still delivers on texture and flavor.
Storing and Bringing It Back to Life
Fridge Storage
Cover the cheesecake tightly with plastic wrap or an airtight lid and store it in the refrigerator for up to 5 days. The chilled environment keeps the layers firm and the flavors meld beautifully over time. If you notice a thin layer of condensation on the surface, simply wipe it off with a paper towel before serving.
Freezer Friendly
Wrap the entire springform pan in a double layer of aluminum foil, then place it inside a freezer‑safe bag. The dessert freezes well for up to 2 months. When you’re ready to enjoy it, transfer it to the fridge the night before and let it thaw slowly; this prevents ice crystals from forming.
Best Reheating Method
Although this is a no‑bake dessert, if you prefer a slightly warmed slice, microwave a single portion for 10‑15 seconds on low power. Add a tiny splash (about a teaspoon) of milk or water before heating; the added moisture creates a gentle steam that revives the creamy texture without turning the cookie dough mushy.